Add Row
Add Element
Add Element
  • Home
  • Categories
    • Makeovers DIY
    • Contractor Services DFY
    • Home Experts DWY
    • Smart Home Upgrades
    • Outdoor Living
    • Down Sized Living
    • Featured
    • Community Causes
August 04.2025
3 Minutes Read

Transform Your Space: How to Clean Matte Porcelain Tiles Wisely

Mop cleaning matte porcelain tiles, showing how to clean matte porcelain tiles.

Mastering the Art of Cleaning Matte Porcelain Tiles

If you want to create a chic, elegant space, it's essential to know the right techniques to clean matte porcelain tiles. While their muted finish adds sophistication to any room, it does come with its challenges. Many homeowners worry about the dirt and grime accumulating in their texture or the soap residue left behind, especially on darker tiles. The good news is that you can maintain their beauty with careful cleaning methods that spare you from damaging your tiles.

The Unique Cleaning Challenges

Matte porcelain tiles are known for their durability, yet cleaning them isn’t straightforward. Their textured surface often hides dust and dirt, which can scratch the tile if not managed properly. Porous by nature, these tiles absorb substances more readily than glossy counterparts, making it critical to clean them correctly to prolong their lifespan.

Step-by-Step Cleaning Process

To make your cleaning process as seamless as possible, follow these detailed steps:

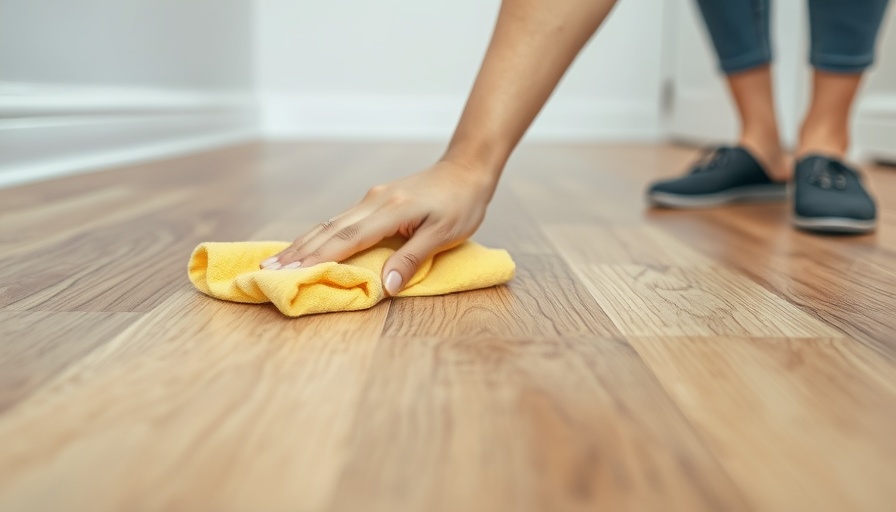
Step 1: Remove Dirt and Dust

Start by pouring warm water into a bucket and adding mild detergent. Use this solution to wash the tiles, effectively lifting dirt and dust from the surface. This step is vital as it helps to prevent harmful scratches, ensuring that your tiles remain in pristine condition.

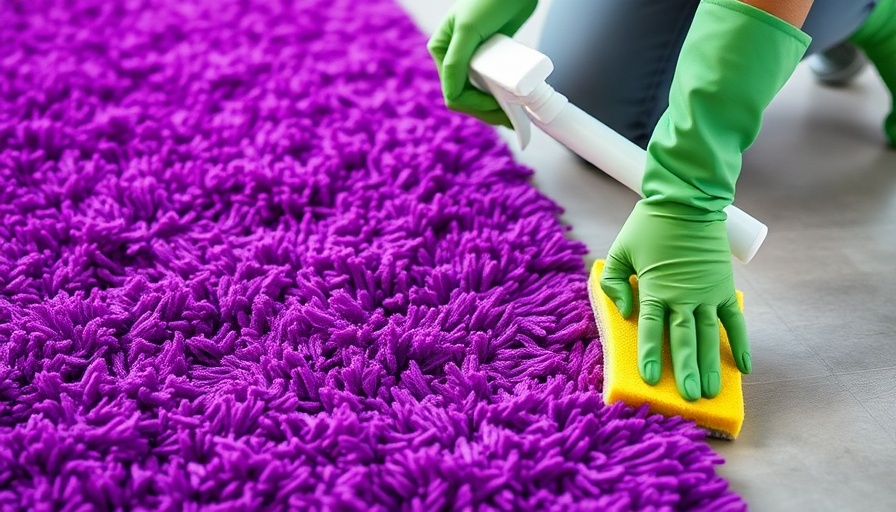
Step 2: Deep Cleaning

If you encounter stubborn stains, bring in the heavy guns! A gentle handheld sponge paired with dishwashing soap will do wonders. You may also utilize household ingredients like vinegar, baking soda, or lemon juice, which serve as safe alternatives to commercial cleaners. Always rub gently—no one likes scratches on their elegant flooring!

Step 3: Limit Water Use

Remember: excessive water is the enemy when dealing with matte porcelain. Too much can lead to absorption, causing potential damage. Employ paper towels to absorb any redundant moisture, and reconsider using heavy mops that might leave excess water behind.

Step 4: Quick Drying is Key

Once you’ve cleaned the tiles, dry them immediately. Air drying in open spaces invites moisture buildup, potentially damaging the matte finish. Grab a microfiber cloth; its unique fiber structure is perfect for swiftly absorbing excess water.

Step 5: Prevention is Better than Cure

To maintain the integrity of your tiles, make a habit of drying any spills ASAP. Keeping mats in humid areas or pathways can save these tiles from direct contact with water. Moreover, consider the environments where you install these tiles—the moisture levels matter. For instance, it might be wiser to install alternative waterproof tiles in areas prone to high humidity like bathrooms or kitchens.

Why Caring for Matte Porcelain Matters

Understanding how to clean matte porcelain tiles isn’t just about effectiveness—it’s about ensuring their longevity. Aside from maintaining aesthetic appeal, proper care can save money on repairs. Cracks and pits can lead to deeper complications, making future repairs more expensive and cumbersome. Adopting these cleaning practices cultivates an atmosphere in your home that reflects pride in ownership.

Common Misconceptions: Debunked!

There’s a persistent myth that cleaning matte tiles requires special chemicals or solutions. In reality, common household items can often do the trick just as well if used correctly. Additionally, many believe that scrubbing harder will yield better results; however, this could lead to unsightly scratches that mar the surface.

Conclusion: Easy Steps for Stunning Results

By taking the time to understand these simple yet effective cleaning methods, you’ll not only keep your matte porcelain tiles looking their best, but you'll also protect your investment. Implement these steps into your cleaning routine and relish the stylish ambiance that clean tiles bring.

For more tips and home improvements, get involved with our community! Share your experiences or ask questions about tile care and other home projects!

Featured

1 Views

0 Comments

Write A Comment

*
*
Related Posts All Posts
08.02.2025

How to Remove Haze from Engineered Hardwood Floors: Essential Guide

Update Understanding the Haze on Your Engineered Hardwood Floors Engineered hardwood floors are a popular choice for homeowners due to their durability and stunning appearance. However, many find themselves facing a common conundrum: the dreaded haze that can mar the beauty of their beloved flooring. If you’re wondering how to remove haze from engineered hardwood floors, you’re certainly not alone. This article dives deep into the causes of floor haze and offers actionable solutions to restore your floors' original shine. The Root Causes of Haze The presence of a haze can often frustrate homeowners, but understanding its origins can help prevent further accumulation. The key culprits often include inappropriate cleaning solutions, excessive water, improper finishing techniques, and overuse of cleaning products. 1. Inappropriate Cleaning Solutions A significant cause of haze is the use of the wrong cleaning agents. Many commercial cleaners, while effective on other surfaces, often contain harsh chemicals or wax that can cloud engineered hardwood. The important takeaway? Always choose products specifically designed for your flooring type. You might consider using a gentle, pH-neutral cleaner to maintain clarity and shine. 2. Excessive Water Usage While it’s essential to clean floors, excessive moisture can lead to swelling and deterioration, resulting in a haze. Engineered hardwood is not water-resistant, so it’s crucial to limit water exposure. Instead of soaking a mop, lightly dampen it and use a microfiber cloth to keep water use to a minimum. 3. Improper Finishing Techniques Another layer of complexity arises from how the flooring is initially treated. If the finishing coat isn’t applied correctly—say, by not waiting for previous layers to dry—it can create haze that persists long after the floor has been installed. It’s always beneficial to consult a flooring professional for this aspect to avoid any missteps. 4. Overuse of Cleaning Products As tempting as it may be to ensure a spotless surface, overapplying cleaner can backfire and result in a cloudy film. Instead of daily applications, aim for moderation—using specialized cleaners like bona once a week can help maintain the floor's natural shine without risking buildup. Strategies for Removal Having understood the causes, homeowners can explore effective methods for removing haze. If you notice a haze on your engineered hardwood floors, here are some techniques you can employ: 1. Vinegar Solution Mixing vinegar with water can create a natural cleaning solution that helps strip away cloudy residues without damaging the finish. A simple mix of one cup of vinegar in a gallon of water can work wonders. 2. Commercial Cleaning Products There are specialized cleaners available on the market designed specifically to tackle haze on hardwood floors. These often contain anti-haze formulas that can safely eliminate cloudiness while enhancing sheen. 3. Gentle Polishing If the haze persists, consider polishing the floor using a soft cloth with a polish specifically for engineered wood. This method smooths out the uneven surface and restores its radiant shine. Maintaining the Shine Once you've successfully removed the haze, preventing it from returning becomes your next priority. Regular maintenance is crucial. Implement a routine of frequent vacuuming to remove dust and debris and use protective mats in high-traffic areas to minimize wear. Seek Professional Help If issues persist or if you're uncertain about the causes and solutions, don’t hesitate to contact a flooring professional. Their expertise can help you save time and prevent further damage. Conclusion Maintaining the beauty of your engineered hardwood floors is achievable with proper care and understanding. By identifying the common causes of haze and employing recommended cleaning strategies, you can keep your floors looking spectacular. For best results, always use products designed for engineered hardwood and regularly review your cleaning techniques. If you've learned something valuable today about how to care for your engineered hardwood floors, consider sharing this with friends and family who might also benefit!

08.01.2025

Mastering Your Shower Curb: A DIY Guide for Beginners

Update Understanding the Importance of a Shower Curb Creating a dry, functional bathroom is paramount in any home. One key element that contributes to this is the shower curb. A shower curb acts as a barrier, preventing water from splashing onto the bathroom floor, thus maintaining a clean, dry environment. For homeowners looking to tackle this project themselves, understanding the essential steps and materials is crucial for a successful installation. Gathering Your Tools and Materials Before diving into the construction process, ensure you have all necessary tools and materials at your disposal. Based on the type of flooring in your bathroom, you will need specific components: Non-corrosive screws to hold elements together securely. A waterproof pan liner to prevent any leakage. Gloves for protection during work. Liner glue to properly secure the pan liner. Cement mortar to form a solid curb structure. Metal lath for added rigidity. Portland cement, which is essential for building a strong base. A flat trowel and a knife for precise cutting and smoothing. Being thoroughly prepared can make the process smoother and more efficient. Step-by-Step Guide to Building a Shower Curb Once you have all supplies, you can follow these straightforward steps to construct your shower curb: Prepare the Shower Curb: Assess the material needed based on your flooring type. Wooden floors require wood bricks, while concrete floors are best suited with cement bricks. Ensure the curb height allows the shower door to function correctly. Apply the Waterproof Pan Liner: This step is critical for ensuring water stays within the shower area. Spread the liner smoothly over the entire shower area, not just the curb section, to provide maximum protection. Construct the Curb: Place your chosen bricks or materials to form the curb, ensuring they align properly. Use cement mortar to secure these materials in place. For added support, consider using 2-3 layers, as this will strengthen the structure against water pressure. Finish the Curb: Once the mortar has set, you can finish the curb with your choice of surface materials. This could include tiling or a textured finish that matches the rest of your bathroom decor. Safety and Best Practices When engaging in a DIY project, safety is paramount. Always wear protective gear, particularly gloves and possibly goggles if you'd be using power tools. Ensure the workspace is clear and organized to prevent accidents. Following a step-by-step approach not only simplifies the process but also mitigates potential mishaps. Maintaining Your Shower Curb After successfully constructing your shower curb, ongoing maintenance is essential to ensure its longevity and effectiveness. Regularly check for cracks or gaps that can develop due to moisture over time. Using a sealant periodically can help supplement your curb’s waterproofing and maintain its integrity. Conclusion: Empowerment Through DIY Building your shower curb not only addresses practical water management issues but also empowers DIY enthusiasts to take control of their living space. Understanding the materials and steps involved allows homeowners to execute this project confidently, on their terms. Embrace the task with proper preparation, and you will enjoy the satisfaction that comes from completing this home improvement task successfully!

07.31.2025

Ultimate Guide: Easy Ways to Clean Your Polyester Rug

Update Why Polyester Rugs Are a Popular ChoiceUnderstanding the appeal of polyester rugs is essential for anyone looking to add comfort and style to their space. In most households, polyester rugs reign supreme due to their durability and stain-resistant properties, making them ideal for high-traffic areas. The material doesn’t fade easily, ensuring your rug maintains its vibrant colors, especially in sunny rooms. Furthermore, they are cost-effective, combining style with a budget-friendly approach, thus appealing to various homeowners.Best Practices to Maintain Your Polyester RugCleaning a polyester rug is easier than one might think. Simple steps can ensure your rug remains attractive and free of dirt or stains.1. **Shake the Rug:** Start by shaking your rug vigorously outdoors or beating it with a broom. This old-school method, although effective, is suitable for smaller rugs. For larger sizes, try rolling them up and taking them outside.2. **Vacuuming:** Use a vacuum cleaner equipped with the appropriate attachments for your polyester rug. Regular vacuuming not only removes dirt but also helps maintain the texture of the fibers.3. **Using Stain Removers:** If you notice fresh stains, act promptly. Employ a specific stain removal product designed for polyester. Applying it as per the instructions ensures that the stain is lifted without damaging the fibers.4. **Dry Shampoo Treatment:** This method revitalizes your rug’s surface, lifting dirt effectively while providing a fresh aroma. Sprinkle a thin layer of dry shampoo, letting it sit for the recommended time before vacuuming it up.5. **Steam Cleaning:** For an intensive cleanse, steam cleaning can work wonders. This method removes deep-seated dirt and revives your rug’s freshness, making it look new again.Common Misconceptions About Polyester RugsDespite their many advantages, some people still harbor misconceptions about polyester rugs. One common myth is that they cannot withstand heavy foot traffic. In reality, polyester is robust and highly durable, making it well-suited for busy homes.Comparing Polyester to Other Rug MaterialsWhen it comes to floor coverings, polyester stands out against other materials like wool or cotton. Unlike wool rugs, which require meticulous care, polyester rugs are much more accessible for regular cleaning. Additionally, synthetic fibers like polyester are generally more affordable than their natural counterparts, allowing for cost-effective decor updates.Taking Advantage of Seasonal CleaningThis season, consider creating a cleaning schedule that incorporates steps for maintaining your polyester rug. Regular upkeep can prevent dirt buildup and prolong the life of your investment. Tie in seasonal deep cleaning with other household duties, making it easier to stay on top of all your home maintenance tasks.What to RememberPolyester rugs are not only stylish but also remarkably practical. With the right care, they can last for years while retaining their original beauty. Implementing basic cleaning routines, as discussed, can make a significant difference in how your rug withstands the test of time.By understanding the features of polyester rugs and how to clean them effectively, you can maintain your home's aesthetic and comfort level. A little effort goes a long way in keeping your space looking inviting and cozy, so don’t overlook this integral part of your home decor.

Terms of Service

Privacy Policy

Core Modal Title

Sorry, no results found

You Might Find These Articles Interesting

T
Please Check Your Email
We Will Be Following Up Shortly
*
*
*