Add Row
Add Element
Add Element
  • Home
  • Categories
    • Makeovers DIY
    • Contractor Services DFY
    • Home Experts DWY
    • Smart Home Upgrades
    • Outdoor Living
    • Down Sized Living
    • Featured
    • Community Causes
August 02.2025
3 Minutes Read

How to Remove Haze from Engineered Hardwood Floors: Essential Guide

Cleaning haze from engineered hardwood floors with a yellow cloth.

Understanding the Haze on Your Engineered Hardwood Floors

Engineered hardwood floors are a popular choice for homeowners due to their durability and stunning appearance. However, many find themselves facing a common conundrum: the dreaded haze that can mar the beauty of their beloved flooring. If you’re wondering how to remove haze from engineered hardwood floors, you’re certainly not alone. This article dives deep into the causes of floor haze and offers actionable solutions to restore your floors' original shine.

The Root Causes of Haze

The presence of a haze can often frustrate homeowners, but understanding its origins can help prevent further accumulation. The key culprits often include inappropriate cleaning solutions, excessive water, improper finishing techniques, and overuse of cleaning products.

1. Inappropriate Cleaning Solutions

A significant cause of haze is the use of the wrong cleaning agents. Many commercial cleaners, while effective on other surfaces, often contain harsh chemicals or wax that can cloud engineered hardwood. The important takeaway? Always choose products specifically designed for your flooring type. You might consider using a gentle, pH-neutral cleaner to maintain clarity and shine.

2. Excessive Water Usage

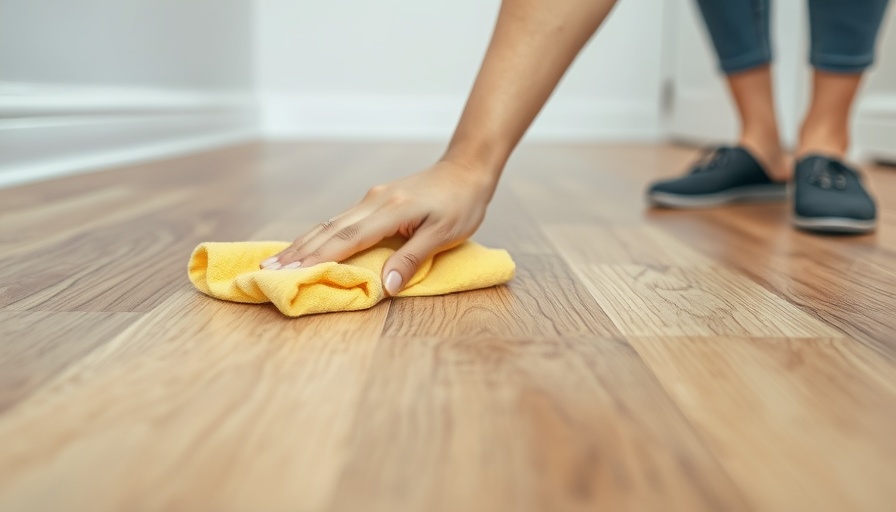
While it’s essential to clean floors, excessive moisture can lead to swelling and deterioration, resulting in a haze. Engineered hardwood is not water-resistant, so it’s crucial to limit water exposure. Instead of soaking a mop, lightly dampen it and use a microfiber cloth to keep water use to a minimum.

3. Improper Finishing Techniques

Another layer of complexity arises from how the flooring is initially treated. If the finishing coat isn’t applied correctly—say, by not waiting for previous layers to dry—it can create haze that persists long after the floor has been installed. It’s always beneficial to consult a flooring professional for this aspect to avoid any missteps.

4. Overuse of Cleaning Products

As tempting as it may be to ensure a spotless surface, overapplying cleaner can backfire and result in a cloudy film. Instead of daily applications, aim for moderation—using specialized cleaners like bona once a week can help maintain the floor's natural shine without risking buildup.

Strategies for Removal

Having understood the causes, homeowners can explore effective methods for removing haze. If you notice a haze on your engineered hardwood floors, here are some techniques you can employ:

1. Vinegar Solution

Mixing vinegar with water can create a natural cleaning solution that helps strip away cloudy residues without damaging the finish. A simple mix of one cup of vinegar in a gallon of water can work wonders.

2. Commercial Cleaning Products

There are specialized cleaners available on the market designed specifically to tackle haze on hardwood floors. These often contain anti-haze formulas that can safely eliminate cloudiness while enhancing sheen.

3. Gentle Polishing

If the haze persists, consider polishing the floor using a soft cloth with a polish specifically for engineered wood. This method smooths out the uneven surface and restores its radiant shine.

Maintaining the Shine

Once you've successfully removed the haze, preventing it from returning becomes your next priority. Regular maintenance is crucial. Implement a routine of frequent vacuuming to remove dust and debris and use protective mats in high-traffic areas to minimize wear.

Seek Professional Help

If issues persist or if you're uncertain about the causes and solutions, don’t hesitate to contact a flooring professional. Their expertise can help you save time and prevent further damage.

Conclusion

Maintaining the beauty of your engineered hardwood floors is achievable with proper care and understanding. By identifying the common causes of haze and employing recommended cleaning strategies, you can keep your floors looking spectacular. For best results, always use products designed for engineered hardwood and regularly review your cleaning techniques.

If you've learned something valuable today about how to care for your engineered hardwood floors, consider sharing this with friends and family who might also benefit!

Featured

5 Views

0 Comments

Write A Comment

*
*
Related Posts All Posts
01.11.2026

Essential Guide: How to Turn Off Water to Toilet and Save Your Home

Update Understanding the Importance of Shutting Off Your Toilet Water A toilet leak can quickly turn your bathroom into an unwanted swimming pool, causing significant stress and potential damage if left unattended. To mitigate these issues, it’s essential to know how to turn off the water supply effectively. This task isn’t as daunting as it seems, especially when you understand the various options available. Where to Locate the Shut-Off Valve Most toilets have a shut-off valve located directly behind the tank, typically towards the wall. This oval or football-shaped valve is your first point of action in stopping the water flow. If you don’t see it immediately, check closely to ensure it’s not hidden behind the toilet or adjacent fixtures. In case the valve is absent, as is often seen in older models, your backup option is to locate the main water supply valve for your entire home, usually found in the basement or outside the house. Knowing this location is vital for emergencies. How to Manually Turn Off Your Toilet Valve Follow these actionable steps to learn how to turn off the water to your toilet manually: Locate the shut-off valve behind your toilet. Turn the valve clockwise to shut it off completely. Some may require a bit of force if they haven’t been used in a while. After you turn it off, flush the toilet. If the tank doesn't refill, you've successfully shut off the water supply. If your valve is stuck due to rust or corrosion, applying a lubricant such as WD-40 can help. Be patient and give it time to work before trying again. In Case of Emergency: Shutting Off the Main Water Supply If your toilet's shut-off valve fails and you face a major leak, your best option is to turn off the main water supply. This will stop all water supply to your home, avoiding further flooding or damage. The main valve is generally found within the basement or outside, enclosed in a box. To turn it off effectively, follow a few simple steps: Locate the main shut-off valve; it often has two wheel handles. Turn the appropriate handle clockwise until it stops. This should disconnect all water flowing into your home. Remember to check if there is another valve that only serves the bathroom fixtures if you want to avoid shutting off water to your entire home. Propping the Float Lever as a Temporary Measure In situations where you need to prevent water from entering the tank without shutting off the supply for repairs, you can prop the float lever. Here’s how: Remove the lid of the toilet tank and find the float lever. Insert a narrow piece of wood or similar item under the float to keep it elevated, halting the valve from refilling. Flush the toilet to drain excess water while keeping the float propped up. After fixing your issue, simply remove the prop, allowing the toilet to refill as usual. This method can be a useful workaround, especially when you're pressed for time during a plumbing emergency. Additional Tips and Tricks It's wise to stay informed about your toilet and plumbing system. Regular maintenance can prevent many issues, making DIY repairs more manageable. For those less confident in their DIY abilities, don’t hesitate to contact a licensed plumber for significant repairs or if you feel out of your depth. A professional can provide swift solutions, ensuring your plumbing remains in good working order. Conclusion Being proactive and knowing how to turn off the water to your toilet can save you from serious headaches and costly repairs. Take the time to familiarize yourself with your toilet’s shut-off mechanism and your main water supply location—it’s a small effort that can yield big benefits in times of need.

12.15.2025

Maximize Your Kitchen Space: Find the Right Cabinet Height

Update The Importance of Finding the Right Kitchen Cabinet Height When it comes to kitchen remodeling, the height of your cabinets can make or break the functionality and visual appeal of your space. For a polished kitchen design, understanding standard cabinet heights and factors that may influence those measurements is crucial. Achieving the right cabinet height is not only about aesthetics but also about practicality. Here's what you need to know about cabinet heights and how they affect your kitchen layout. Understanding Standard Kitchen Cabinet Height Most homeowners often wonder what the ideal height is for kitchen cabinets. Standard kitchen cabinets are typically installed at 54 inches from the floor, with upper cabinets should be placed about 18 inches above the countertops. The reasoning behind this height is straightforward. A standard base cabinet is 34.5 inches tall, and when combined with a countertop that is generally 1.5 inches high, the total height becomes 36 inches. Adding the traditional 18-inch backsplash gives you a total height of 54 inches, which is a comfortable reach for most users. Factors Influencing Cabinet Height However, cabinet height is not a one-size-fits-all measure. Several factors can impact how high your cabinets should be: Ceiling Height: For kitchens with 9-foot ceilings, choosing 42-inch wall cabinets is common. This allows a tidy 12-inch space between the cabinets and the ceiling, creating a balanced look. Countertop Thickness: Depending on your choice of countertop, adjusting the upper cabinet height may be required to accommodate thickness variances. Cooking Range Proximity: Safety should always be a priority. Leaving enough distance between the cooking area and the cabinets is crucial to prevent heat-related hazards. Backsplash Height: The standard height for backsplashes is 18 inches, but variations can occur. Confirming the specific requirements for your kitchen can inform cabinet height decisions. Personal Reach: Ultimately, your family’s needs should dictate cabinet placement. Families that include taller or shorter individuals may benefit from custom cabinet heights. Best Practices for Installing Kitchen Cabinets While the standard measurements provide a great starting point, consider following these best practices: Measure Thoughtfully: Use a tape measure to determine the ideal height based on both user comfort and design preferences. Account for all kitchen elements, including cabinet bases and countertops. Consult the Experts: If you're unsure, consulting with experienced contractors or designers can elevate your kitchen design, ensuring you make the right choices for your unique space. Testing Convenience: Check accessibility of frequently used items. If you find yourself straining to reach an item, adjusting cabinet height could be a game-changer. Consider Customization: Many modern kitchens allow for customization, giving you the flexibility to design a space that’s truly functional for your lifestyle. Final Thoughts: Elevate Your Kitchen Aesthetic Choosing the right cabinet height can significantly transform your kitchen’s functionality and overall aesthetic. By blending comfort with style and practicality, you can create a kitchen that not only meets your everyday needs but also enhances your home’s appeal. Don't underestimate how crucial this single detail can be for your kitchen remodel! As you plan your renovation, keep in mind the multitude of factors to consider and be open to advice from professionals. They can offer invaluable insights tailored to your specific kitchen layout and personal preferences.

12.09.2025

Transform Your Space with Stunning Ceiling Bathroom Lighting Ideas

Update Shining a Light on Bathroom Design Trends Revamping your bathroom's ceiling lighting can significantly enhance your space, providing the perfect balance of form and function. In light of recent design trends, this guide will explore contemporary ceiling lighting ideas that are both stylish and practical. Perfect for anyone looking to transform a mundane bathroom into a serene retreat, these lighting solutions bring functionality while creating a luxe atmosphere. Importance of Lighting in Bathroom Design The right ceiling lighting is essential in defining the ambiance of your bathroom. This often-underestimated element can uplift the overall aesthetic, making even the smallest spaces feel grand. With advancements in lighting technology, options now range from energy-efficient LEDs to smart lighting systems, offering endless possibilities for creativity. 1. Emphasize General Lighting Begin your bathroom remodel by considering general lighting that provides a comprehensive illumination. Using overhead fixtures makes a world of difference, especially if you focus on areas where light is crucial, such as near the vanity and shower. Flush-mount fixtures or recessed lighting ensures you achieve a bright, clear space that remains stylish. 2. Layering for Depth and Functionality Experimenting with various types of lighting creates depth and interest in your bathroom. Employing a mix of ambient, task, and accent lighting can illuminate key spaces effectively. For instance, brass fittings can add elegance while sconces beside the mirror provide focused light for grooming tasks. 3. Statement Chandelier for Luxury Why not add a touch of glamour? A chic chandelier can serve as a stunning focal point. Adding a modern or vintage chandelier not only elevates your bathroom's decor but also offers ambient lighting throughout the space. Popular choices include crystal chandeliers or metallic finishes that tie together contemporary themes. 4. Incorporating LED and Smart Lighting LEDs are revolutionizing bathroom lighting with their long-lasting nature and energy efficiency. Moreover, smart lighting systems allow for customizable settings that match different moods, from bright light for a morning routine to a soft glow for relaxing evenings. Imagine controlling your lighting with just your voice—a perfect marriage of luxury and convenience! 5. Ambient and Accent Lighting Introduce ambient lighting for an overall glow and accent lighting to highlight specific features, such as artwork or architectural details. Consider recessed lighting above a bathtub or a backlit mirror to create an inviting atmosphere. This layered approach gives your bathroom a spa-like feel, making it a sanctuary for self-care. Using Natural Materials Natural materials like wood and stone are trending in 2025 bathroom designs. Combining these elements with strategic lighting choices enhances warmth and makes your space feel grounded. Wooden accents, especially when paired with pendant or geometric light fixtures, create a serene environment that invites relaxation. 6. Color and Textures Matter Have fun with colors in your bathroom lighting. Whether you prefer cool tones for a tranquil vibe or warm hues for a cozy atmosphere, color impacts mood and style. Textured lampshades or unique fixtures can act as art pieces while also serving important lighting functions. Conclusion: Transform Your Bathroom with Lighting As you explore these bathroom ceiling lighting ideas, consider how each element can reflect your personal style while fulfilling practical needs. A successful lighting design involves balancing beauty and functionality for a cohesive and serene atmosphere. Take the plunge and elevate your bathroom into a well-lit haven that's both stylish and personal. Discover the latest lighting options available today and start your journey toward a transformed, serene retreat.

Terms of Service

Privacy Policy

Core Modal Title

Sorry, no results found

You Might Find These Articles Interesting

T
Please Check Your Email
We Will Be Following Up Shortly
*
*
*