Add Row
Add Element
Add Element
  • Home
  • Categories
    • Makeovers DIY
    • Contractor Services DFY
    • Home Experts DWY
    • Smart Home Upgrades
    • Outdoor Living
    • Down Sized Living
    • Featured
    • Community Causes
July 22.2025
3 Minutes Read

Low Thermopile Voltage: Essential Insights for Homeowners

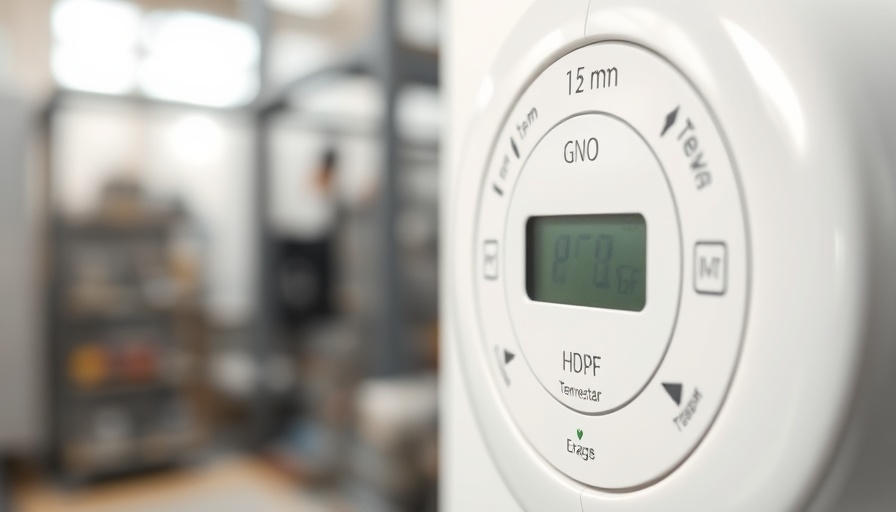
Close-up of a thermostat panel indicating low thermopile voltage.

Understanding Thermopile Voltage in Water Heaters

As winter approaches, many of us start relying heavily on hot water for our daily routines. However, nothing complicates this convenience quite like a sudden failure in your water heater. A common issue that many homeowners encounter is a low thermopile voltage, which can quickly leave you in a cold shower. But what does this mean and what steps can you take to address it?

What is a Thermopile?

The thermopile is a crucial component of gas water heaters, designed to monitor temperature and ensure proper operation. It consists of a series of thermocouples that work together to generate voltage when heated by the pilot light. Without the thermopile functioning correctly, your water heater simply cannot heat the water as intended, which can lead to a frustrating lack of hot water.

Causes of Low Thermopile Voltage

Low thermopile voltage can stem from a variety of issues. Notably, improper installation of the water heater may lead to wiring problems that affect the thermopile's operations. Additionally, the pilot light itself plays a significant role; if the pilot light goes out, the thermopile can't generate the required voltage, resulting in a loss of hot water.

Testing Your Thermopile: A Simple Guide

If you suspect that your thermopile might be the culprit behind your hot water woes, testing it is a straightforward process that doesn't require professional assistance. You will, however, need a multimeter set to record voltage levels.

  • Step 1: Set Up Your Multimeter: Before you begin, ensure your multimeter is adjusted to read millivolts, which are necessary for measuring the low voltage range of the thermopile.
  • Step 2: Disconnect Wiring: Carefully detach the wiring from the gas control unit, ensuring you keep track of connections.
  • Step 3: Connect Leads: Attach the black positive lead to the white wire and the red lead to the red wire of the thermopile.
  • Step 4: Light the Pilot: Follow the manufacturer's instructions for igniting the pilot light. The moment the pilot lights up, watch the readings on your multimeter – it should show an increase in voltage.
  • Step 5: Adjust Settings: Press the thermostat knob to increase voltage maximally, maintaining patience throughout the process.

Common Misconceptions about Thermopile Voltage

One prevalent misconception is that a low thermopile voltage always signifies a defective unit. On the contrary, while a faulty thermopile may require replacement, low voltage can also be attributed to external factors such as gas supply interruptions or improper installation. Recognizing these nuances is vital for homeowners, allowing for informed decisions before jumping to conclusions or calling in a professional.

When to Seek Professional Help

While many thermopile issues can be troubleshot independently, there are instances where it’s prudent to call a professional. If your tests indicate that the thermopile voltage is persistently low even after following all installation and testing procedures, seeking expert assistance can save you time and effort.

Conclusion: Don’t Be Left in the Cold

Your water heater is an essential element of your home comfort. Understanding how to diagnose and address issues like low thermopile voltage empowers you as a homeowner. As winter sets in, ensuring your water heater operates smoothly is crucial for maintaining a warm and welcoming home. Take action to test your thermopile and ensure your water heater is ready when you need it most!

Featured

1 Views

0 Comments

Write A Comment

*
*
Related Posts All Posts
09.08.2025

Transform Your Home with Expert Tips on Tongue and Groove Flooring

Update An Overview of Tongue and Groove Flooring Tongue and groove flooring has emerged as a popular choice for homeowners aiming to achieve a stylish and elegant look with minimal effort and expense. This type of flooring employs a straightforward yet effective installation method that allows planks to lock together, making it ideal for those considering a DIY project. A significant advantage is the floating floor technique used, which enables planks to sit atop an underlayment rather than being permanently glued or nailed down. This versatility not only makes it easier to install but also simplifies future replacements. Advantages of Choosing Tongue and Groove Flooring This flooring option boasts numerous benefits: it is cost-effective, quick to install, and provides a beautiful wood-like appearance without the hefty price tag of traditional hardwood. Additionally, ample options exist with tongue and groove products available in both engineered and solid wood formats. Engineered flooring, for instance, is designed for added stability and often features a prefinished surface, saving time during installation. Preparation is Key: Essential Steps Before Installation Proper preparation can significantly reduce headaches during the installation process. Begin by ensuring the subfloor is clean, dry, and free from any imperfections that could impact the final result. Install a quality underlayment with a vapor barrier to promote longevity and protect against moisture damage. Selecting high-quality tongue and groove materials is equally crucial, as this will impact both the floor’s durability and aesthetic appeal. Installing Tongue and Groove Flooring: A Step-By-Step Guide The installation process for tongue and groove flooring is relatively straightforward, making it suitable for DIY enthusiasts. Start by laying the underlayment across the subfloor, ensuring that it overlaps without gaps. Next, take the first plank and position it with the groove facing the wall, leaving a slight expansion gap. Insert the tongue of the next plank into the groove of the previous plank, and continue this process across the floor. Secure each plank by gently tapping it into place with a hammer and a tapping block to achieve a snug fit. Common Mistakes to Avoid When Installating While the DIY installation of tongue and groove flooring is accessible, several common mistakes can lead to issues down the line. For example, neglecting to leave adequate expansion gaps can cause the flooring to buckle over time, especially in humid climates. Moreover, failing to use an appropriate underlayment may result in uneven floors and increased wear. To mitigate these risks, take your time during the installation process and consult manufacturer guidelines whenever needed. Future Trends in Flooring: Sustainable Options As environmental awareness increases, more homeowners are seeking sustainable flooring options. Manufacturers are responding by producing tongue and groove flooring made from reclaimed wood or sustainable sources, allowing homeowners to enjoy the aesthetic benefits while also contributing to environmental conservation. Staying informed about these options can greatly expand your flooring choices and align with green building practices. Your Next Steps in Flooring Choices Before you embark on your tongue and groove flooring journey, assess your specific needs and preferences. Consider factors such as the type of material you prefer, the layout of your space, and your budget constraints. Do thorough research, perhaps consulting with flooring experts to explore the best options suited for your home. By being proactive, you’ll ensure that your new flooring not only looks beautiful but also lasts for years to come. In conclusion, tongue and groove flooring offers a myriad of aesthetic and practical advantages for homeowners eager to enhance their living spaces. With proper preparation, execution, and an eye toward sustainable options, you can transform your floors into an elegant and inviting feature of your home.

09.07.2025

SPC vs WPC Flooring: Key Differences to Inform Your Choice!

Update Understanding SPC and WPC Flooring: A Comprehensive OverviewWhen it comes to upgrading your flooring, two popular options that often come up are Stone Plastic Composite (SPC) and Wood Plastic Composite (WPC) flooring. Both alternatives are recognized for their durability and water resistance, making them appealing choices for homeowners in search of reliable flooring solutions. But how do they differ?What is SPC Flooring?SPC flooring is known for its robust construction, which includes a core made from a mixture of limestone and stabilizers. This blend creates a rigid and indestructible flooring option that can withstand heavy foot traffic and is resistant to water damage. Its layered structure typically includes a backing layer, a solid SPC core, a printed vinyl layer for style, and a wear layer that protects against scratches and dents.The Layers of WPC FlooringOn the other hand, WPC flooring incorporates a different philosophy in design, particularly regarding the comfort level. WPC features a core made of PVC with added wood fibers, providing a softer underfoot feel compared to SPC. Like SPC, WPC flooring consists of several layers: a backing layer, a resilient WPC core, a printed vinyl layer that enhances aesthetics, and a protective wear layer.Feature-wise Comparison: Cost and ComfortCost is often a decisive factor when choosing between SPC and WPC flooring. Generally, WPC is priced higher due to its added comfort and insulation qualities, which can make homes feel warmer during colder months. Conversely, SPC flooring is budget-friendly, offering similar durability at a lower price point. However, while SPC is less flexible, it is immensely durable, suitable for high-traffic areas and commercial settings.Durability and Maintenance: Which Lasts Longer?In terms of longevity, both SPC and WPC flooring are designed to last, but their construction leads to differing care requirements. SPC's rigid core contributes to its resistance against rips and tears, making maintenance straightforward—often limited to regular sweeping and occasional mopping. WPC, although also durable, may require more care due to its softer core. Homeowners should ensure that heavy furniture is moved carefully to avoid indentations.Installation Process: A Step-by-Step GuideThe installation process can influence the decision as well. Both options can be installed through a floating installation method, which means they can be placed over existing floors without the need for glue or nails. This feature makes them particularly appealing for DIY projects. Prior to installation, surface preparation is essential to ensure a smooth and long-lasting floor.Making the Right Choice for Your HomeUltimately, choosing between SPC and WPC flooring should depend on your specific needs. Those looking for high durability and cost-effective flooring options may lean towards SPC, whereas homeowners who prioritize comfort and aesthetic appeal may opt for WPC. Understanding your lifestyle needs can greatly inform your decision.Conclusion: Invest Wisely in Your FlooringAs you contemplate elevating the ambiance of your home through flooring, consider the distinctions between SPC and WPC. An informed decision will not only enhance the visual appeal of your space but also ensure longevity, durability, and satisfaction in your choice.

09.04.2025

Master the Art of Mopping: Tips for a Spotless Floor

Update Why Proper Mopping Matters Understanding the right way to mop a floor goes beyond aesthetics; it greatly impacts the hygiene and lifespan of your flooring. Improper techniques can lead to buildup of dirt, grime, and bacteria, making your floors a health hazard. Not to mention, it can damage the materials of your floor over time, leading to costly repairs or replacements. A clean floor not only enhances the visual appeal of your home but also promotes a healthier living environment. Preparation is Key: Clear the Clutter Before mopping, ensure your floors are entirely clear of furniture and obstacles. This enables you to access all areas, including those hard-to-reach spots. If you are hesitating to move heavy items, consider using furniture sliders to ease the task. Properly prepared floors allow for more effective cleaning and less chance of missing sections. The Importance of Sweeping Before Mopping A common misconception is that mopping alone can adequately clean a floor. However, sweeping or vacuuming is crucial as it removes dust, debris, and pet hair that can create muddy messes when wet. Skipping this step can leave your floor looking worse after mopping, defeating the entire purpose of the task. Use a soft broom or a vacuum cleaner to prep the area before mopping, assuring optimal results. Choosing the Right Cleaning Solution Not all floors are created equal, and neither are the products you use on them. For instance, hardwood floors require pH-neutral cleaners to avoid damage, while vinyl can be effectively cleaned with vinegar solutions. Understanding the specific needs of your flooring type makes a significant difference in the long-term maintenance: Hardwood: Use mild soap—harsh chemicals can damage the finish. Laminate: Similar to hardwood, use a damp mop and clean spills immediately. Vinyl: A vinegar-water mix cleans effectively without sticky residues. Ceramic Tile: Vinegar is great for tackling odors and germs. Always test any new cleaning solution in a small, inconspicuous area first to avoid adverse reactions. Step-by-Step Guide to Mopping When you’re ready to mop, here’s a step-by-step guide to ensure effective results: Clear the Room: Remove furniture and obstacles. Sweep Thoroughly: Vacuum or sweep the entire area. Prepare Your Bucket: Use two buckets—one with cleaning solution and one with clean water to rinse your mop. Start from the Corner: Work your way back, preventing foot traffic over your clean floor. Maintain Your Mop: After use, wash the mop to prolong its lifespan; hang to air dry. Following these steps will ensure a thorough clean and contribute to prolonging the beauty and longevity of your flooring. Hydration is Key: Avoid Over-Saturation One critical mistake while mopping is using too much water. A mopping technique that leaves the floor soaked can be detrimental, especially for materials like hardwood or laminate that are porous and sensitive to moisture. Wring out your mop thoroughly; it should be slightly damp, not dripping. Know Your Floor: Tailoring Your Approach Each flooring type has its own unique maintenance needs. For example, stone tiles require a milder pH-neutral cleaner to avoid damage from harsh chemicals, while vinegar can work wonders on ceramic floors. Recognizing the specific needs of your flooring will lead to cleaner surfaces and fewer repairs in the long run. Actionable Insights for a Sparkling Finish Consider creating a schedule for mopping depending on the traffic in specific areas of your home. High-traffic zones may need more frequent cleaning, while less used areas could be addressed less often. By having a plan, you can maintain that fresh, sparkling finish effortlessly. The Emotional Rewards of a Clean Home A clean home environment nurtures not only aesthetics but also emotional well-being. Walking on a freshly cleaned floor can instill a sense of pride and comfort, making your living space more enjoyable. Embrace the benefits as a motivation to perfect your mopping technique. Next time you grab your mop, remember these insights and techniques to achieve a cleaner, healthier home. A little preparation and knowledge go a long way in floor maintenance. Consider making mopping a well-planned routine that contributes to a brighter, healthier living space, making every sweep and swipe count!

Terms of Service

Privacy Policy

Core Modal Title

Sorry, no results found

You Might Find These Articles Interesting

T
Please Check Your Email
We Will Be Following Up Shortly
*
*
*