Add Row
Add Element
Add Element
  • Home
  • Categories
    • Makeovers DIY
    • Contractor Services DFY
    • Home Experts DWY
    • Smart Home Upgrades
    • Outdoor Living
    • Down Sized Living
    • Featured
    • Community Causes
August 04.2025
3 Minutes Read

Simple Steps to Safely Clean Your Silk Rug at Home

How to Clean a Silk Rug: vibrant floral pattern silk rugs displayed.

Mastering Silk Rug Care: Your Essential Guide

Silk rugs can add an air of elegance to any home, but keeping them clean and vibrant can pose a challenge. Fear not: you don’t need to spend a fortune on professional cleaning services to maintain the beauty of your silk carpets. This guide will take you through effective and safe methods for cleaning your silk rug at home, ensuring it continues to dazzle for years to come.

Understanding the Delicate Nature of Silk

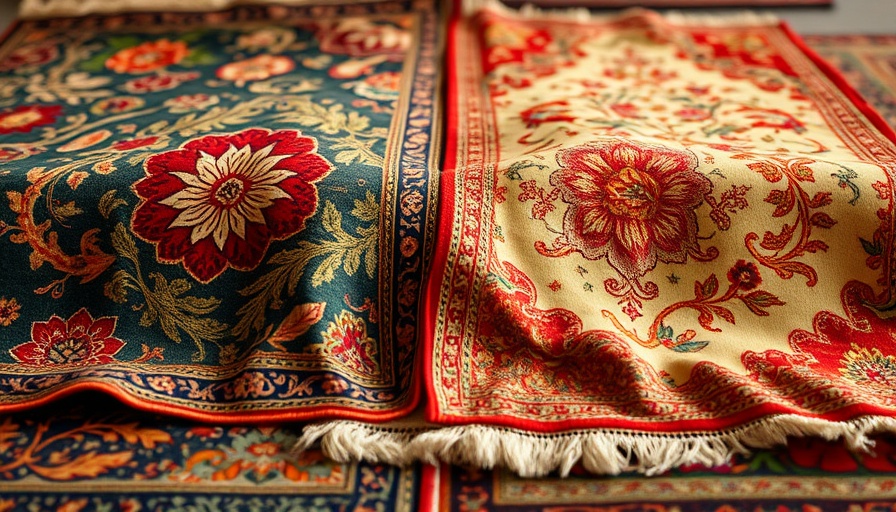
Silk rugs are prized for their luxurious feel and intricate designs; however, they require a gentle touch when it comes to cleaning. Traditional methods that work on other types of carpets can damage the fibers of silk, making it essential to adopt a tailored approach. For example, using a steam cleaner can lead to water damage, which is one of the biggest threats to silk.

Preparing Your Silk Rug for Cleaning

Before diving into cleaning, it's crucial to prepare your silk rug:

  • Brooming: Start with a soft broom to remove dust and debris. This gentle method will protect the delicate fibers while ensuring maximum dirt is cleared away.
  • Vacuuming: Use a vacuum cleaner specifically designed for delicate fabrics. A classic upright vacuum, avoiding steam options, can help eliminate hidden dirt particles without causing damage.

Homemade Cleaners: A Natural Alternative

When store-bought solutions are too harsh, why not turn to natural ingredients? High-quality, homemade cleaners can effectively tackle stains and grime on silk rugs:

  • Baking Soda: A fantastic natural stain remover, simply sprinkle on stubborn spots and allow it to sit for about 15 minutes. It draws out dirt and absorbs odors.
  • Vinegar Solution: Mix one part vinegar with four parts water and apply this to problematic stains. Vinegar acts as a natural disinfectant while loosening stubborn deposits, making them easier to clean up.

Step-by-Step Guide to Cleaning Your Silk Rug

  1. Step 1: Begin with a light brooming to clear the top surface.
  2. Step 2: Vacuum with an appropriate machine to eliminate deep-set dirt.
  3. Step 3: Apply baking soda to deal with tough stains, letting it absorb before removal.
  4. Step 4: Use the vinegar solution for any remaining messes, ensuring a gentle touch to avoid harming the fibers.
  5. Step 5: Conclude with dry cloths to soak up any leftover moisture.

Final Tips for Silk Rug Maintenance

Periodically check your rugs for wear: Regular inspection can help you catch issues early. If damage appears, such as frayed edges, consider seeking professional restoration services before the damage worsens.

Rotate your rug: This ensures even fading and wear, helping maintain its appearance.

Preventive Measures to Keep Your Rug Pristine

While cleaning helps maintain the beauty of your silk rug, preventing stains is just as crucial. Try placing your rug in low-traffic areas, and avoid direct sunlight to prevent fading.

Conclusion: Enjoy Your Elegant Silk Rug

By implementing these cleaning techniques, you can ensure your silk rug stays beautiful and adds to the charm of your home. Remember: proper care not only enhances the longevity of your rug but also keeps it looking its best, adding luxury and warmth to your living spaces.

Ready to take the plunge and start cleaning your silk rug the right way? Use this guide as your roadmap to keep your carpets in prime condition—an effort that will pay dividends in the form of aesthetics and comfort in your home!

Featured

1 Views

0 Comments

Write A Comment

*
*
Related Posts All Posts
08.07.2025

Discover the True Cost of Home Saunas in 2025: Are They Worth It?

Update The Cost Factors Behind Home Saunas in 2025 Building a home sauna has never been more popular, especially as we prioritize self-care and wellness in our daily lives. By 2025, the average cost to install a sauna can range between $3,000 to $4,500, but various factors influence these prices significantly. Understanding what drives costs in this growing market is crucial for anyone considering a personal sauna. Types of Saunas and Their Pricing When it comes to home saunas, there is no one-size-fits-all price tag. Homeowners can choose from various sauna types based on their needs, each with a unique cost structure: 1. Wood-Burning Saunas Ironically, the atmospheric charm of wood-burning saunas keeps them in demand. Homeowners can heat their space with real flames, making for an enriched experience. However, the need for continuous wood supply can raise maintenance costs, averaging around $4,500 to $6,000, depending on the structure. 2. Electric Saunas Electric saunas are increasingly popular due to their user-friendly operation and rapid temperature control. While the initial cost can be higher, about $3,500 to $5,500, the convenience often outweighs the price. However, consider the potential increase in electricity bills, especially in regions where rates are elevated. 3. Infrared Saunas Infrared saunas are distinctive for their low-energy usage yet high effectiveness. Comparing costs, they typically fall between $2,000 and $4,000, making them an attractive option for budget-conscious homeowners looking for therapeutic benefits without compromise. 4. Steam Saunas For those who fancy a luxury experience right in their homes, steam saunas are a fantastic option. They can cost up to $10,000 but offer a lavish experience akin to retreats in upscale hotels. Their versatility allows for creative installation in compact spaces, making them a sought-after addition. 5. Shower-Sauna Combinations With growing interest in multifunctional spaces, shower-sauna combinations are blooming in popularity. The cost can fluctuate based on design and materials, typically landing between $2,500 to $5,000. This option is appealing for those looking to optimize their bathroom spaces while ensuring relaxation. Installation Considerations and Planning Investing in a sauna is not just about the upfront costs; installation plays a crucial role. Homeowners should prepare for additional expenses involving plumbing, electric work, and structural modifications if they plan to build a sauna from scratch or modify an existing space. Proper planning can help in managing these potential costs effectively. The Future of Home Saunas As the wellness industry continues to evolve and technology enhances our homes, the concept of home saunas will further ignite interest. Emerging trends may include automated systems for temperature control and eco-friendly materials that align with sustainability efforts. Homeowners looking to install a sauna in the next few years should stay vigilant about the latest innovations and trends that might affect costs. Practical Tips for Homeowners If you're ready to dive into the sauna experience, here are a few actionable insights: Assess Your Space: Make sure you have enough room for the type of sauna you want without compromise. Consider ventilation needs and accessibility before finalizing your choice. Energy Efficiency: Choose an energy-efficient model that aligns with both your budget and environmental considerations. This adds long-term value. Professional Consultation: Consult with contractors to get realistic estimates on installation, ensuring you factor in all necessary work. In conclusion, a personal sauna can be a valuable investment that enhances your quality of life.

08.06.2025

DIY Dog Wash Station: Transform Bath Time into Fun Time for Your Pet

Update Transforming Your Pet Care Routine: The DIY Dog Wash Station RevolutionAs pet ownership continues to rise, so too does the desire for practical home improvements that cater to our furry friends. One trend capturing the attention of homeowners is the DIY dog wash station, a functional space that streamlines the often messy task of washing pets. By creating an efficient space in your home, you can save time and keep your pet’s bathing experience enjoyable.Why You Should Consider Building a Dog Wash StationBuilding a dog wash station is not just about convenience; it’s about enhancing your pet’s hygiene and comfort. Dogs—especially those that enjoy outdoor activities—are prone to dirt, mud, and other outdoor elements that can be challenging to manage indoors. With a dedicated wash station, pet owners can more easily clean their animals, minimize mess, and also provide a space that can be pleasing both aesthetically and practically.Choosing the Right Location for Your DIY Dog Wash StationWhen planning a DIY dog wash station, choosing the right location is crucial. Common placements include:Garage: A space that can easily accommodate water and drainage while providing a durable cleaning environment.Backyard: An outdoor setup allows for easy rinsing without worrying about indoor messes. Ensure that drainage is properly managed.Basement: Utilizes existing plumbing and can be adapted for wash use.Such considerations ensure that your dog wash station is functional and minimizes inconvenience.Key Tools and Materials: What You'll NeedYour DIY project will require various tools and materials, including:Acrylic or fiberglass shower pan (60" x 36")16-inch wood pieces (2" x 4")Plywood (1 ¾ inch, 4" x 8")Cement board sheet (4 pieces)Thinset mortar, tiles, and a handheld shower head assemblyHaving the right materials on hand will enable a smoother building process.Step-by-Step Instructions: Building Your StationHere’s a summary of the steps to follow:1. Wood CuttingStart by cutting wood pieces to specified dimensions, ensuring accuracy for stability.2. Building the FrameUsing the cut wood, construct the walls by assembling pieces into a rectangular enclosure.3. Installing the Shower PanPlace and secure the shower pan atop the wooden frame, ensuring it is level.4. Tiling and Finishing TouchesApply tiles with an adhesive; let them set in place for an attractive finish that’s easy to clean.Practical Insights: Maintaining Your Dog Wash StationOnce your dog wash station is complete, regular maintenance is essential. Routine cleaning of tiles and plumbing will keep the station in prime condition and prolong its durability. Consider investing in eco-friendly cleaning products that are safe for pets, ensuring a clean space that’s also considerate of your dog’s health.Common Misconceptions About Dog Wash StationsMany might assume that building a dog wash station requires extensive carpentry skills or considerable investment. However, with careful planning and the right guidance, this project is very much achievable for the average homeowner. Another misconception is that such stations are only beneficial for large dogs; in reality, they cater well to dogs of all sizes, ensuring that every furry companion can enjoy a clean and comfortable bath.Conclusion: Making Dog Baths a BreezeBuilding a DIY dog wash station is not merely a home improvement project; it’s an investment in your pet's health and your home's cleanliness. By taking the time to create a tailored space, you’ll simplify your pet care routine significantly. So, grab those tools and start crafting your dog’s dream bathing area today!

08.04.2025

Transform Your Space: How to Clean Matte Porcelain Tiles Wisely

Update Mastering the Art of Cleaning Matte Porcelain Tiles If you want to create a chic, elegant space, it's essential to know the right techniques to clean matte porcelain tiles. While their muted finish adds sophistication to any room, it does come with its challenges. Many homeowners worry about the dirt and grime accumulating in their texture or the soap residue left behind, especially on darker tiles. The good news is that you can maintain their beauty with careful cleaning methods that spare you from damaging your tiles. The Unique Cleaning Challenges Matte porcelain tiles are known for their durability, yet cleaning them isn’t straightforward. Their textured surface often hides dust and dirt, which can scratch the tile if not managed properly. Porous by nature, these tiles absorb substances more readily than glossy counterparts, making it critical to clean them correctly to prolong their lifespan. Step-by-Step Cleaning Process To make your cleaning process as seamless as possible, follow these detailed steps: Step 1: Remove Dirt and Dust Start by pouring warm water into a bucket and adding mild detergent. Use this solution to wash the tiles, effectively lifting dirt and dust from the surface. This step is vital as it helps to prevent harmful scratches, ensuring that your tiles remain in pristine condition. Step 2: Deep Cleaning If you encounter stubborn stains, bring in the heavy guns! A gentle handheld sponge paired with dishwashing soap will do wonders. You may also utilize household ingredients like vinegar, baking soda, or lemon juice, which serve as safe alternatives to commercial cleaners. Always rub gently—no one likes scratches on their elegant flooring! Step 3: Limit Water Use Remember: excessive water is the enemy when dealing with matte porcelain. Too much can lead to absorption, causing potential damage. Employ paper towels to absorb any redundant moisture, and reconsider using heavy mops that might leave excess water behind. Step 4: Quick Drying is Key Once you’ve cleaned the tiles, dry them immediately. Air drying in open spaces invites moisture buildup, potentially damaging the matte finish. Grab a microfiber cloth; its unique fiber structure is perfect for swiftly absorbing excess water. Step 5: Prevention is Better than Cure To maintain the integrity of your tiles, make a habit of drying any spills ASAP. Keeping mats in humid areas or pathways can save these tiles from direct contact with water. Moreover, consider the environments where you install these tiles—the moisture levels matter. For instance, it might be wiser to install alternative waterproof tiles in areas prone to high humidity like bathrooms or kitchens. Why Caring for Matte Porcelain Matters Understanding how to clean matte porcelain tiles isn’t just about effectiveness—it’s about ensuring their longevity. Aside from maintaining aesthetic appeal, proper care can save money on repairs. Cracks and pits can lead to deeper complications, making future repairs more expensive and cumbersome. Adopting these cleaning practices cultivates an atmosphere in your home that reflects pride in ownership. Common Misconceptions: Debunked! There’s a persistent myth that cleaning matte tiles requires special chemicals or solutions. In reality, common household items can often do the trick just as well if used correctly. Additionally, many believe that scrubbing harder will yield better results; however, this could lead to unsightly scratches that mar the surface. Conclusion: Easy Steps for Stunning Results By taking the time to understand these simple yet effective cleaning methods, you’ll not only keep your matte porcelain tiles looking their best, but you'll also protect your investment. Implement these steps into your cleaning routine and relish the stylish ambiance that clean tiles bring. For more tips and home improvements, get involved with our community! Share your experiences or ask questions about tile care and other home projects!

Terms of Service

Privacy Policy

Core Modal Title

Sorry, no results found

You Might Find These Articles Interesting

T
Please Check Your Email
We Will Be Following Up Shortly
*
*
*