Add Row
Add Element
Add Element
  • Home
  • Categories
    • Makeovers DIY
    • Contractor Services DFY
    • Home Experts DWY
    • Smart Home Upgrades
    • Outdoor Living
    • Down Sized Living
    • Featured
    • Community Causes
March 13.2025
3 Minutes Read

Exploring the Differences: Window Jamb vs. Reveal for Homeowners

Window installation tips illustrated with a cozy window reveal and craftsmanship details.


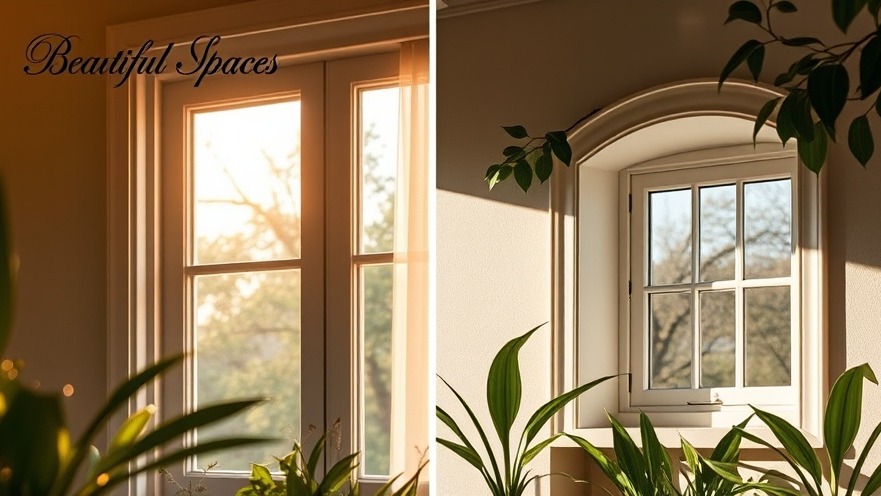
Understanding the Building Blocks: Window Jambs and Reveals

When it comes to home renovations and maintenance, knowledge is power, especially regarding windows—a feature integral to aesthetics and function. Two terms often mentioned yet frequently confused are window jamb and window reveal. As homeowners, builders, or DIY enthusiasts, understanding these elements can transform how you approach window installations or upgrades.

The Core Function of a Window Jamb

A window jamb serves as the vertical side of the window frame, providing critical support for the entire window structure. Typically constructed from durable materials like wood, metal, or uPVC, jambs not only support the window sash but also aid in the smooth operation of operable windows. Properly designed jambs enclose essential window hardware—like tracks and balances—that contribute to the window's functionality and energy efficiency. They help in sealing away draughts, ensuring your home remains warm—a timely consideration for homeowners looking to maintain comfort.

What Exactly is a Window Reveal?

Contrasting with the functional role of the jamb, the window reveal refers to the aesthetic element surrounding a window. It is the visible area extending from the edge of the window frame into the interior of the room. Finished with materials like plaster or timber, reveals offer both charm and practicality. They cover any unsightly gaps between the wall and window frame, enhancing insulation and minimizing condensation. Properly designed reveals can seamlessly integrate with the home’s architecture, thereby elevating curb appeal.

Key Differences: Function Meets Design

The pivotal distinction between jambs and reveals lies in their purpose and functionality. Window jambs are essential for structural integrity and window operation, while window reveals focus on the visual and aesthetic aspect of the installation. A sturdy jamb is vital for a window's durability, while a well-finished reveal serves to enhance the home’s charm and thermal performance.

Why This Knowledge is Crucial for Homeowners

Understanding the critical differences between a window jamb and a reveal could save homeowners significant time and money in maintenance. For instance, if you're facing difficulties such as a window that won’t open smoothly, the issue may lie in the jamb rather than the reveal. Conversely, if you're noticing draughts, the reveal would likely need attention. A clear grasp of these components empowers homeowners to undertake informed decisions about renovations and repairs, ensuring ultimately a well-constructed and visually appealing window installation.

Practical Tips for Window Installation

As you plan your next window project, consider expert insights highlighted in guides like the one by Family Handyman. They emphasize that addressing the jamb first is crucial before focusing on the reveal. Measure carefully, mark reveals on the jambs, and ensure your window is fitted within the specified insulation zone—a step that significantly impacts energy efficiency.

Current Trends in Window Designs

Homeowners today are increasingly conscious of both aesthetics and efficiency when it comes to windows. With transitions towards environmentally friendly materials and designs, opting for products that enhance thermal performance not only benefits the individual homeowner but also contributes positively to the broader community. For instance, employing cavity closers or insulated frames aligns with modern construction practices that mitigate thermal bridging while enhancing the overall durability of installed windows — a win-win for comfort and sustainability.

Conclusion: Prioritize Understanding

In wrapping up this exploration, gaining a deeper understanding of window jambs and reveals is vital—not only for aesthetics but also for functionality and energy efficiency. With clear knowledge of their differences and roles, homeowners can confidently engage in renovation projects, ensuring that every window installation enhances both the appearance and functionality of their beloved homes.

As you embark on your next DIY adventure or consider hiring a professional, remember that thoughtfully built components transition your renovation dreams into reality, leading you to a more efficient and beautiful home.


Featured

2 Views

0 Comments

Write A Comment

*
*
Related Posts All Posts
12.09.2025

Transform Your Space with Stunning Ceiling Bathroom Lighting Ideas

Update Shining a Light on Bathroom Design Trends Revamping your bathroom's ceiling lighting can significantly enhance your space, providing the perfect balance of form and function. In light of recent design trends, this guide will explore contemporary ceiling lighting ideas that are both stylish and practical. Perfect for anyone looking to transform a mundane bathroom into a serene retreat, these lighting solutions bring functionality while creating a luxe atmosphere. Importance of Lighting in Bathroom Design The right ceiling lighting is essential in defining the ambiance of your bathroom. This often-underestimated element can uplift the overall aesthetic, making even the smallest spaces feel grand. With advancements in lighting technology, options now range from energy-efficient LEDs to smart lighting systems, offering endless possibilities for creativity. 1. Emphasize General Lighting Begin your bathroom remodel by considering general lighting that provides a comprehensive illumination. Using overhead fixtures makes a world of difference, especially if you focus on areas where light is crucial, such as near the vanity and shower. Flush-mount fixtures or recessed lighting ensures you achieve a bright, clear space that remains stylish. 2. Layering for Depth and Functionality Experimenting with various types of lighting creates depth and interest in your bathroom. Employing a mix of ambient, task, and accent lighting can illuminate key spaces effectively. For instance, brass fittings can add elegance while sconces beside the mirror provide focused light for grooming tasks. 3. Statement Chandelier for Luxury Why not add a touch of glamour? A chic chandelier can serve as a stunning focal point. Adding a modern or vintage chandelier not only elevates your bathroom's decor but also offers ambient lighting throughout the space. Popular choices include crystal chandeliers or metallic finishes that tie together contemporary themes. 4. Incorporating LED and Smart Lighting LEDs are revolutionizing bathroom lighting with their long-lasting nature and energy efficiency. Moreover, smart lighting systems allow for customizable settings that match different moods, from bright light for a morning routine to a soft glow for relaxing evenings. Imagine controlling your lighting with just your voice—a perfect marriage of luxury and convenience! 5. Ambient and Accent Lighting Introduce ambient lighting for an overall glow and accent lighting to highlight specific features, such as artwork or architectural details. Consider recessed lighting above a bathtub or a backlit mirror to create an inviting atmosphere. This layered approach gives your bathroom a spa-like feel, making it a sanctuary for self-care. Using Natural Materials Natural materials like wood and stone are trending in 2025 bathroom designs. Combining these elements with strategic lighting choices enhances warmth and makes your space feel grounded. Wooden accents, especially when paired with pendant or geometric light fixtures, create a serene environment that invites relaxation. 6. Color and Textures Matter Have fun with colors in your bathroom lighting. Whether you prefer cool tones for a tranquil vibe or warm hues for a cozy atmosphere, color impacts mood and style. Textured lampshades or unique fixtures can act as art pieces while also serving important lighting functions. Conclusion: Transform Your Bathroom with Lighting As you explore these bathroom ceiling lighting ideas, consider how each element can reflect your personal style while fulfilling practical needs. A successful lighting design involves balancing beauty and functionality for a cohesive and serene atmosphere. Take the plunge and elevate your bathroom into a well-lit haven that's both stylish and personal. Discover the latest lighting options available today and start your journey toward a transformed, serene retreat.

12.07.2025

How to Fix Scratches on Engineered Hardwood Floors: A Detailed Guide

Update Understanding Engineered Hardwood Floors: Beauty Meets DurabilityEngineered hardwood floors have become a staple in modern homes due to their resilience and aesthetic appeal. However, even the strongest materials can fall victim to wear and tear over time. It's no surprise that homeowners may encounter scratches on their beautifully crafted flooring, leaving them to wonder how to restore its original allure. Understanding the various approaches to fix scratches can save money and bring back the shine to your floors. This guide will dive deep into effective techniques tailored for a range of scratch severities.Light vs. Heavy Scratches: Knowing the DifferenceBefore tackling scratches, it’s essential to identify their depth. Light scratches typically affect only the wood veneer and can be easily buffed out. However, deeper scratches can expose the core, requiring a different repair approach. Homeowners can utilize specific techniques based on the type of damage to restore their floors to pristine condition. Effective diagnosis allows for the most appropriate repair measures to be applied.Buffing Out Light Scratches with EaseLight scratches can often be resolved with simple buffing techniques. Use fine-grit sandpaper in the direction of the grain to delicately smooth out the scratch, being cautious not to damage the veneer. After buffing, clean the area with rubbing alcohol to remove any debris. This simple yet effective method can rejuvenate the floor's surface, making marks nearly invisible again.Essential Items: What You’ll NeedThe first step towards scratching repair is gathering the appropriate tools. This includes:Rubbing Alcohol: To clean the scratched area.Fine-Grit Sandpaper: For buffing out light scratches.Wax Repair Kit: A color-matched kit specifically designed for wood floors.Scratch Concealer: Ideal for those deeper, more noticeable scratches.Microfiber Cloths and Putty Knife: These assist in applying and smoothing out the repair products.Having these items on hand will facilitate a smoother, more efficient repair process.Applying Wax: The Go-To Solution for Deeper ScratchesFor moderate to heavy scratches that extend beyond the veneer, applying wood floor wax is often the most effective method. Choose a wax that closely matches your floor's color and ensure the surface is clean beforehand. Use a putty knife to carefully fill in the scratch with the wax, smoothing over any excess. This method not only covers the scratch but also adds a protective layer to preserve the floor’s finish.Utilizing Scratch Concealer to Mask DamageScratch concealers can serve as a magic wand for visible damage on your hardwood floors. They are designed to seal the scratches and restore the color of the wood. Simply follow the manufacturer’s instructions: clean the scratched area, apply the concealer, and let it cure beneath light. Doing this will effectively reduce the visibility of white lines from deeper scratches, returning your floor's beauty.Refinishing: The Ultimate FixIn cases where scratches remain stubborn after other methods, refinishing the floor may become necessary. This process involves sanding down the floor's surface and applying a new layer of finish. This method is more labor-intensive but offers a complete rejuvenation of your hardwood floors. Homeowners should evaluate whether they are equipped for this DIY project or if they should consult a professional.The Importance of Regular MaintenanceTo prolong the life of your engineered hardwood floors and minimize scratches, incorporate a regular maintenance routine. This may include sweeping or vacuuming to prevent dirt accumulation and utilizing protective pads on furniture to avoid nicks. Proper care not only enhances the appearance but also preserves the value of your investment.Conclusion: Take Your Floors Back to Their BestScratches on engineered hardwood can be bothersome, but they are far from a death sentence for your flooring. By equipping yourself with the right knowledge and tools, you can tackle these imperfections head-on. Whether you’re buffing out, waxing, or utilizing concealers, restoring your floor's beauty is possible!Don’t let scratches dictate the aesthetics of your home—give your engineered hardwood floors the attention they deserve and enjoy their beauty again.

12.03.2025

Wondering Why Your Water Heater Is Leaking? Here's What You Need to Know

Update Understanding the Causes of Your Water Heater Leak Experiencing a leak in your water heater can be a perplexing and frustrating issue for homeowners. Water pooling around the heater can lead to water damage, mold, and even hazardous conditions if left unchecked. To address this issue effectively, it's crucial to identify the source of the leak. Common Types of Water Heater Leaks Water heaters comprise several interconnected components, and leaks can stem from various sources. The two most common types of leaks involve the tank and the connections to pipes: Tank Leaks: These are generally the most severe leaks, typically caused by rust or sediment buildup. If the tank itself is compromised, it often requires complete replacement. Connection Leaks: Leaks at the pipes or fittings are more common and can usually be repaired by tightening or replacing faulty components. Identifying the Leak Source If you notice water accumulating at the base of your water heater, several potential sources might be the culprit: Drain Valve: This valve, located at the bottom of the tank, can become loose or damaged, causing leaks. Check for moisture around it and tighten if necessary. Temperature and Pressure Relief (T&P) Valve: If the T&P valve is faulty or the system is over-pressurized, it can leak. Inspect this valve regularly to ensure it's functioning properly. Temperature Readings: Excessive heat can lead to leaks as well. Most manufacturers recommend a temperature setting between 120°F to 140°F to prevent overheating. Diagnosing Your Water Heater Issues To monitor and manage potential leaks: Routine Maintenance: Regularly check your water heater for signs of wear, such as rust or unusual noises, which can indicate underlying problems. Flushing the Tank: Sediment buildup can cause overheating and subsequent failures. Flushing your water heater annually can help maintain its health. When to Call a Professional While some leaks can be fixed by homeowners with moderate plumbing skills, more serious issues—like a leaking tank—should be handled by professionals. Additionally, if you're uncomfortable diagnosing the issue, it's wise to contact a licensed plumber. They can ensure repairs comply with local codes and standards, reducing the risk of future problems. Conclusion: Proactive Steps to Ensure a Leak-Free Water Heater Proactively addressing potential leaks in your water heater can significantly extend its lifespan and prevent extensive water damage in your home. Regular inspections and maintenance checks can help catch problems early. If you notice a leak, determining the cause quickly and implementing the appropriate repairs can save you time and money in the long run.

Terms of Service

Privacy Policy

Core Modal Title

Sorry, no results found

You Might Find These Articles Interesting

T
Please Check Your Email
We Will Be Following Up Shortly
*
*
*