Add Row
Add Element
Add Element
  • Home
  • Categories
    • Makeovers DIY
    • Contractor Services DFY
    • Home Experts DWY
    • Smart Home Upgrades
    • Outdoor Living
    • Down Sized Living
    • Featured
    • Community Causes
July 13.2025
3 Minutes Read

Explore Top Hardwood Floor Underlayment Options for Your Home

Hardwood floor underlayment options with layered setup

Understanding the Importance of Underlayment for Hardwood Floors

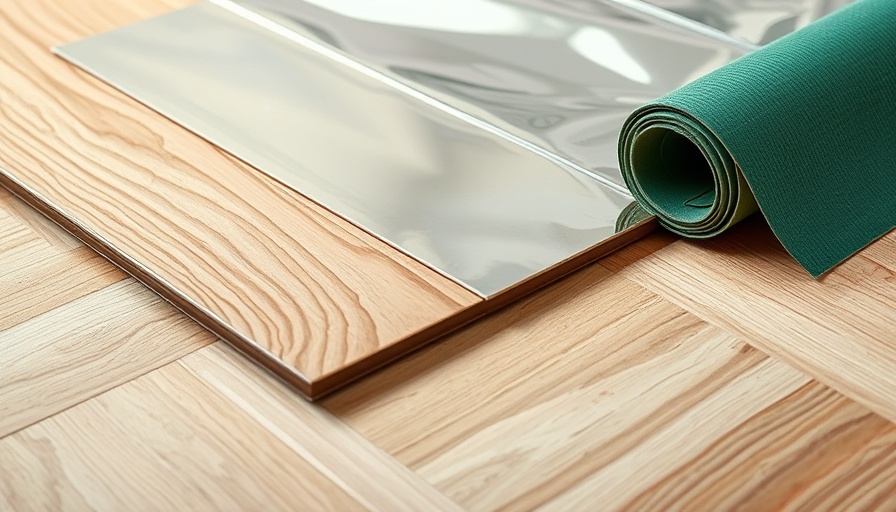
When considering hardwood flooring, one crucial component often overlooked is the underlayment. This thin layer provides both a physical barrier and a cushioning effect, helping to enhance the durability and comfort of your floors. Not only does it facilitate installation, but it also plays a significant role in moisture management, soundproofing, and temperature control. Without the right underlayment, even the finest hardwood can suffer in terms of performance and longevity.

Top Underlayment Options for Hardwood Flooring

While many options are available, the best underlayment for hardwood floors varies based on materials, installation locations, and specific needs. Here are standout selections that offer great advantages:

1. TrafficMASTER Polyethylene Foam – The Budget Pick

This budget-friendly underlayment offers a 2-millimeter thick foam layer, perfect for those looking for a lightweight and flexible solution. The self-adhesive strips simplify the installation process while providing a reliable moisture barrier, making it ideal for living rooms, bedrooms, and any other household area needing a solid foundation.

2. Roberts AirGuard Floor Underlayment – The Go-To for Laminate

Renowned for its cushioning properties, the Roberts AirGuard is a thin yet sturdy underlayment that doesn’t compromise on comfort. It excels particularly under laminate floors, preventing ripping in varying subfloor conditions. The product also allows for effective sound dampening, which is essential in multi-level homes.

3. DUROCK Cement Backer Board – The Tile Champion

For homeowners opting for ceramic, porcelain, or stone tiles, DUROCK provides an unrivaled underlayment solution. Its thickness, ranging from 0.25 to 0.50 inches, ensures not only a flat installation surface but also powerful protection against moisture and mildew. Suitable for laundry rooms and countertops alike, its durability is noteworthy.

4. Eco Cork Foam Premium Underlayment – The Eco-Friendly Choice

A product of environmental consciousness, the Eco Cork Foam is both waterproof and antimicrobial, crucial for areas susceptible to moisture, like basements. It provides support while keeping harmful bacteria at bay. With a thickness of 3.2 millimeters, it’s designed for versatility across diverse flooring types.

5. DMX 1 Step 2.0 Underlayment – The Vinyl Compatible

Finally, the DMX underlayment is tailor-made for vinyl plank installations. Its features create an effective moisture barrier and cushioning layer, significantly enhancing the longevity and appearance of vinyl floors in high-moisture zones like bathrooms.

Key Considerations When Choosing Underlayment

While it’s tempting to go for the cheapest option, it’s vital to consider several factors when selecting your underlayment:

  • Moisture Resistance: Particularly in lower levels of the home or areas susceptible to spills, opt for underlayments that can absorb or repel excess moisture.
  • Sound Absorption: In homes with multiple stories or shared walls, sound management becomes crucial. Look for underlayments touted for noise reduction.
  • Installation Ease: Many products come with self-adhesive options, which greatly simplify installation tasks for DIY enthusiasts.
  • Environmental Impact: Eco-friendly options, like cork, offer both durability and health benefits, making them a compelling choice for the environmentally conscious homeowner.

Conclusion: Making the Right Choice

Choosing the right underlayment for your hardwood flooring impacts installation ease, soundproofing abilities, and moisture resistance. By understanding your options and considering your specific needs, you can enhance the longevity and performance of your hardwood floors. Remember, investing in a high-quality underlayment pays dividends in comfort and durability.

Featured

14 Views

0 Comments

Write A Comment

*
*
Related Posts All Posts
10.05.2025

Why Does My Water Heater Pilot Light Keep Going Out? Uncover the Easy Fixes!

Update Understanding Your Water Heater's Pilot Light A water heater’s pilot light is a small but vital component that initiates the heating process. When this flame goes out unexpectedly, it can leave you without hot water, an inconvenient situation, especially during the cold months. Whether you are dealing with lukewarm showers or needing to lash out at cold taps, knowing how to tackle pilot light issues can save you both time and repair costs. Common Causes of Pilot Light Malfunctions If you find yourself frequently reigniting your water heater’s pilot light, it’s essential to understand the root causes and the steps you can take to address them. Here are the top issues that might cause your pilot light to flicker or go out entirely: 1. The Thermocouple is Faulty The thermocouple is a safety device that detects whether the pilot light is burning. If it senses that the flame has gone out, the thermocouple will shut off the gas supply to prevent leaks. A malfunctioning thermocouple is one of the most common reasons for a pilot light that won’t stay lit. Thankfully, this repair is generally straightforward and can often be done within an hour. 2. Insufficient Combustible Air Your water heater needs a consistent supply of air to maintain the pilot flame. If the area surrounding your heater is cluttered with debris or lint, it can restrict airflow and cause the flame to go out. Regular cleaning is crucial to ensure proper ventilation and unimpeded airflow. 3. A Dirty Pilot Tube The pilot tube is responsible for delivering gas to the pilot light. If it becomes clogged with dust or other debris, the pilot light may not receive enough gas, resulting in a flickering flame or extinguishing altogether. It is essential to clean this component regularly to maintain consistent operation. 4. Main Control Valve Problems Another less common but equally troublesome issue could stem from the main control valve. This component controls the flow of gas to the burner and may need to be replaced if it doesn’t function correctly. If you suspect a problem with the main control valve, it is recommended to contact a professional for assistance. 5. Electrical Wiring Issues Bad electrical wiring can also play a role in pilot light problems. If your water heater suddenly shuts off, it could signal an issue with the electrical setup. Always hire a licensed professional to address electrical concerns to ensure safety and proper diagnosis. Steps to Resolve Pilot Light Issues Here are some practical steps you can take if you find your pilot light has gone out: Check the Thermocouple: If you suspect the thermocouple needs replacing, follow manufacturer directions cautiously to carry out the replacement. Clean the Surroundings: Ensure there are no dust or debris around the heater to maintain good airflow. Unclog the Pilot Tube: If debris is blocking the pilot tube, carefully clean it using a slender needle or pipe cleaner. Seek Professional Help: If these measures do not resolve the issue, or if you face electrical or main control valve problems, it’s time to call in an expert for a thorough inspection and service. When to Call a Professional While many pilot light issues can be resolved through simple troubleshooting, certain symptoms warrant a professional examination. If you frequently experience problems despite attempts to fix them, it’s crucial to seek expert assistance. Professionals can provide reliable diagnosis and avoid potential hazards, ensuring your system runs smoothly and safely. Embracing Water Heater Awareness Understanding your water heater’s functionality—or lack thereof—can empower you as a homeowner. Taking proactive steps not only enhances the longevity of your appliance but improves efficiency, resulting in consistent hot water for your needs. Should you ever experience issues that seem beyond DIY fixes, don’t hesitate to reach for professional help. Your comfort and safety should always come first.

09.30.2025

Elevate Your Bedroom: Discover the Luxury of a TV Lift Cabinet

Update Elevate Your Bedroom Experience with a TV Lift Cabinet Imagine ending a long day, nestled comfortably in your bed, watching your favorite shows without the clutter of traditional TV setups. With one simple remote, a beautifully crafted TV lift cabinet reveals your entertainment in style. This innovative piece of furniture not only enhances your viewing experience but transforms your bedroom into a sanctuary of relaxation and luxury. The Beauty of a Clutter-Free Space The modern bedroom should serve as a retreat, an escape from everyday stress. Traditional TVs mounted on walls or bulky stands can detract from the serene atmosphere we desire. The addition of a TV lift cabinet cleans up visual distractions, providing a tidy, peaceful space. With the capability to tuck away your television when not in use, you reclaim valuable floor space and enhance the aesthetic appeal of your room. Functionality Meets Design: The Case for TV Lift Cabinets TV lift cabinets offer more than just a place for your television. These sophisticated pieces feature hidden storage spaces for remotes, gaming consoles, or DVDs, keeping your items organized and out of sight. The smooth motorized operation allows for controlled viewing at your convenience, making it easier to enjoy your entertainment without the hassle of cords and clutter. Quality Craftsmanship: Why Handcrafted Matters Choosing a TV lift cabinet from manufacturers like TVLiftCabinet.com ensures you receive a product made from 100% American craftsmanship. Using real wood and high-quality finishes, these cabinets promise durability and elegance. Whether you prefer a warm wooden finish or a modern, sleek look, there’s a lift cabinet to suit your personal style and needs. Popular Choices for the Discerning Homeowner Among the standout options is the Clubside Honeycomb TV Lift Cabinet, a perfect mix of design and function that accommodates screens up to 55 inches. The unique honeycomb finish not only enriches the room's decor but also guarantees a quiet, seamless experience with every lift. This specific model epitomizes what it means to blend style and technology in your personal space. Who Can Benefit from a TV Lift Cabinet? If you’re passionate about interior design or simply want to integrate the latest smart furniture solutions into your home, a TV lift cabinet is for you. It appeals to homeowners looking to minimize visual clutter while enjoying modern conveniences. For tech enthusiasts, integrating such smart designs helps to create an interactive, sophisticated living environment. Changing Perspectives: Embracing Smart Home Solutions The integration of smart technologies into home design is rapidly growing. The TV lift cabinet is a prime example of this trend, as it caters to the desire for streamlined functionality in living environments. Motorized lift systems, controllable via remote or smart devices, exemplify how technology can enhance our daily lives, making entertainment more accessible and enjoyable. Conclusion: Transform Your Sleeping Space Today By investing in a TV lift cabinet, you're not just purchasing furniture–you’re enhancing your lifestyle. This luxurious upgrade eliminates clutter, heightens comfort, and revamps your entertainment experience. Are you ready to elevate your bedroom into an oasis of peace and style? Explore the options available to you today!

09.26.2025

Expert Steps to Clean Your Shark Vacuum for Maximum Suction Power

Update Why Cleaning Your Shark Vacuum is Essential Maintaining your Shark vacuum isn’t just about aesthetics; it’s crucial for ensuring its longevity and efficiency. Over time, dirt, hair, and other debris can accumulate in various components including the dust cup, filters, and brush rolls. If left unchecked, not only does this lead to decreased suction power, but it can also emit unpleasant odors and even ultimately damage the motor. Addressing these issues promptly ensures that your vacuum remains a valuable ally in your cleaning arsenal. What You Need to Clean a Shark Vacuum Before diving into the cleaning process, gather the right tools. Here’s a checklist of items you’ll need: Microfiber cloths for wiping and dusting A large bowl or sink for rinsing parts A trash can for disposing of debris A soft-bristled nylon brush to tackle tough spots Gloves to protect your hands A drying rack for air-drying components A seam ripper or small scissors to remove tangled hair from the roller brush Equipping yourself with these tools ensures that you efficiently clean every aspect of your Shark vacuum, from the dust cup to the roller brushes. Step-by-Step Guide to Cleaning Your Shark Vacuum With your tools ready, you can follow these detailed steps to clean your Shark vacuum: Step 1: Safety First Always unplug your vacuum before starting the cleaning process. If possible, take it outdoors to avoid a mess inside your home when shaking out debris. Step 2: Inspect and Clean the Roller Brush The roller brush is often a hotspot for hair and dirt buildup. Detach it carefully following the manufacturer’s instructions — most models have a push button for easy release. Once detached, use scissors to carefully cut away any hair or debris tangled in the brush. You can then use a soft brush or cloth to clean the remaining dirt. Ensure the brush dries completely before reattaching it, as moisture can lead to mold growth inside your vacuum. Step 3: Empty and Clean the Dust Collection Cup Regularly check the dust cup and empty it once it’s half full to maintain suction power. Dispose of the contents into a trash can and rinse the cup with warm water to eliminate any residue. Allow the dust cup to dry completely before reassembly. This periodic cleaning will enhance airflow and performance. Step 4: Clean the Filters Your Shark vacuum likely features washable filters. Remove the filters according to your vacuum’s user manual, rinse them with water, and let them air dry fully. Avoid using a cloth to hasten the drying process, as this can damage the filters. Replace them only once they are completely dry to uphold optimal performance. Step 5: Inspect Hoses for Blockages After completing the cleaning of detachable parts, check the vacuum’s hose for any clogs. You can gently flex the hose and use a long object like a broom handle to dislodge any blockages. A clear hose ensures unimpeded airflow, enhancing your vacuum’s efficiency. How Often Should You Clean Your Shark Vacuum? The frequency with which you clean your Shark vacuum largely depends on usage. A general guideline is to perform these cleaning steps every month or after a significant cleaning session, particularly if you have pets or frequent visitors with pets. Check the filters regularly as well, especially if you notice a decrease in suction power — they may need a rinse or replacement as necessary. Investing Time for Longevity By taking the time to regularly clean your Shark vacuum, you are investing in the longevity and effectiveness of this vital cleaning tool. Failing to put in this effort can lead to costly repairs or replacements down the line. Get Started on Your Cleaning Journey Now that you’ve read through this comprehensive guide, it’s time to put these steps into action. Not only will your Shark vacuum perform better, but you’ll also experience a fresher, more pleasant environment at home.

Terms of Service

Privacy Policy

Core Modal Title

Sorry, no results found

You Might Find These Articles Interesting

T
Please Check Your Email
We Will Be Following Up Shortly
*
*
*