Add Row
Add Element
Add Element
  • Home
  • Categories
    • Makeovers DIY
    • Contractor Services DFY
    • Home Experts DWY
    • Smart Home Upgrades
    • Outdoor Living
    • Down Sized Living
    • Featured
    • Community Causes
July 18.2025
3 Minutes Read

Eliminate Stubborn Hard Water Stains in Your Toilet: Effective Tips

Toilet with hard water stains needing removal.

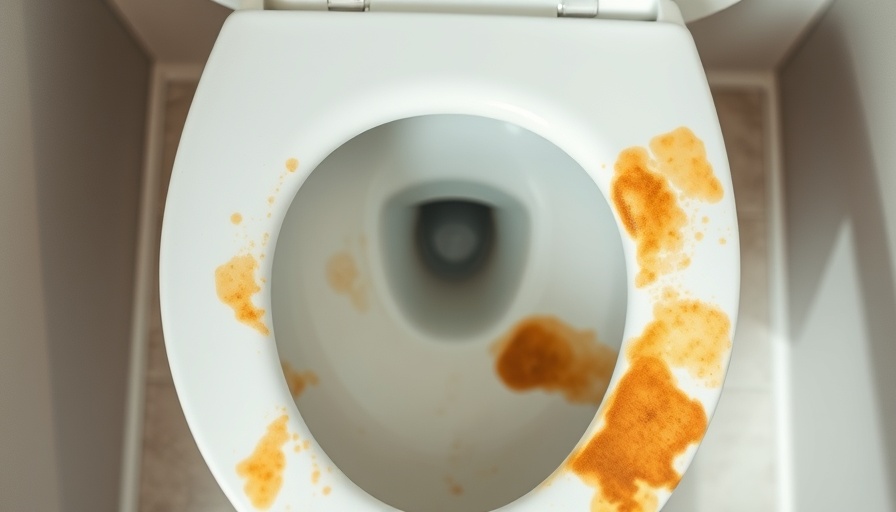
Say Goodbye to Hard Water Stains in Your Toilet

Hard water stains in the toilet bowl can be an unsightly burden for any homeowner, but understanding how to deal with them can transform your bathroom cleaning routine. Hard water contains high levels of minerals that leave stubborn stains, including mold and rust, which often accumulate on various surfaces such as taps, showerheads, and washbasins. Luckily, there are numerous effective methods for tackling these hues of frustration. Here, we explore some practical tips to eliminate hard water stains once and for all, ensuring the charm of your bathroom is restored.

Understanding the Impact of Hard Water

Before diving into the cleaning tactics, let’s take a step back and understand why hard water is such a nuisance. When water evaporates, it leaves behind these minerals that bond to surfaces, creating lasting stains. If left unattended, these stains can not only detract from your toilet’s appeal but can also cause long-term damage to the porcelain and plumbing systems. Regular cleaning routines can help prevent serious issues down the line, making maintenance an essential aspect of smart home management.

Essential Tools and Materials for Successful Cleaning

Before tackling those stains, you'll need to gather some necessary supplies. Here’s a handy list to ensure you’re fully equipped:

  • White Vinegar
  • Baking Soda
  • Borax
  • Paper Towels
  • Pumice Stone
  • Toilet Brush
  • Gloves
  • Coca-Cola

These tools will serve you well in your quest for a stain-free toilet.

Top Techniques for Removing Stains

Below, we’ll highlight some tried-and-true methods for effectively removing tough hard water stains:

1. White Vinegar: Your Best Friend in Cleaning

Using white vinegar is one of the most effective techniques. It’s a natural acid, which means it can effectively break down mineral deposits. Start by removing as much water as possible from the toilet bowl using a plunger. Then, pour vinegar around the bowl, spreading it with a cloth. Leave it overnight, and in the morning, scrub with a toilet brush or pumice stone for stubborn areas.

2. Baking Soda and Vinegar: The Dynamic Duo

Combining baking soda with vinegar creates a fizzing reaction that helps dislodge even the most stubborn stains. Pour one cup of vinegar into the bowl, followed by a cup of baking soda. Wait ten minutes, then scrub. This eco-friendly method is also useful for the bathroom floors, making it a versatile solution.

3. Borax Toilet Cleaner Combo

Another great option is to mix borax and vinegar. Combine three-quarters of a cup of borax with one cup of vinegar and add a few drops of lemon oil for a fresh scent. Pour this concoction into the toilet bowl and leave for at least 30 minutes before scrubbing. Borax not only helps disinfect but also targets tough stains.

4. Coca-Cola: A Surprising but Effective Method

Believe it or not, Coca-Cola can be an effective cleaner for toilets. The citric acid in soda can help break down stains. Pour it into the toilet bowl and let it sit for an hour before scrubbing. The results may surprise you!

5. Pumice Stone: For Stubborn Stains

If stains persist, consider using a pumice stone. Wet the stone and gently scrub the stain. Always ensure the stone and the toilet are wet to avoid scratching the surface. This technique is a great final step if other methods haven’t worked.

6. Preventive Measures for Future Stains

Knowing how to remove hard water stains is fantastic, but preventing them is even better! Consider these tips to keep your toilet pristine:

  • Regular cleaning with vinegar can help avoid buildup.
  • Install a water softener to reduce mineral content in your water supply.
  • Wipe down surfaces frequently to keep them clear of stains.

Taking these small steps can ensure your toilet shines for longer.

Empowering Yourself with Knowledge

Equipped with these tips and techniques, you can easily combat hard water stains in your toilet. Understanding the nature of hard water allows you to take proactive measures, keeping your bathroom looking its best. Not only does maintaining cleanliness enhance your home’s aesthetics, but it also contributes to better sanitation and environmental health.

If you’re ready to tackle those hard water stains, stay proactive and implement these tips today. Maintaining a clean and inviting bathroom is achievable with a little bit of effort and the right approach.

Featured

2 Views

0 Comments

Write A Comment

*
*
Related Posts All Posts
01.11.2026

Essential Guide: How to Turn Off Water to Toilet and Save Your Home

Update Understanding the Importance of Shutting Off Your Toilet Water A toilet leak can quickly turn your bathroom into an unwanted swimming pool, causing significant stress and potential damage if left unattended. To mitigate these issues, it’s essential to know how to turn off the water supply effectively. This task isn’t as daunting as it seems, especially when you understand the various options available. Where to Locate the Shut-Off Valve Most toilets have a shut-off valve located directly behind the tank, typically towards the wall. This oval or football-shaped valve is your first point of action in stopping the water flow. If you don’t see it immediately, check closely to ensure it’s not hidden behind the toilet or adjacent fixtures. In case the valve is absent, as is often seen in older models, your backup option is to locate the main water supply valve for your entire home, usually found in the basement or outside the house. Knowing this location is vital for emergencies. How to Manually Turn Off Your Toilet Valve Follow these actionable steps to learn how to turn off the water to your toilet manually: Locate the shut-off valve behind your toilet. Turn the valve clockwise to shut it off completely. Some may require a bit of force if they haven’t been used in a while. After you turn it off, flush the toilet. If the tank doesn't refill, you've successfully shut off the water supply. If your valve is stuck due to rust or corrosion, applying a lubricant such as WD-40 can help. Be patient and give it time to work before trying again. In Case of Emergency: Shutting Off the Main Water Supply If your toilet's shut-off valve fails and you face a major leak, your best option is to turn off the main water supply. This will stop all water supply to your home, avoiding further flooding or damage. The main valve is generally found within the basement or outside, enclosed in a box. To turn it off effectively, follow a few simple steps: Locate the main shut-off valve; it often has two wheel handles. Turn the appropriate handle clockwise until it stops. This should disconnect all water flowing into your home. Remember to check if there is another valve that only serves the bathroom fixtures if you want to avoid shutting off water to your entire home. Propping the Float Lever as a Temporary Measure In situations where you need to prevent water from entering the tank without shutting off the supply for repairs, you can prop the float lever. Here’s how: Remove the lid of the toilet tank and find the float lever. Insert a narrow piece of wood or similar item under the float to keep it elevated, halting the valve from refilling. Flush the toilet to drain excess water while keeping the float propped up. After fixing your issue, simply remove the prop, allowing the toilet to refill as usual. This method can be a useful workaround, especially when you're pressed for time during a plumbing emergency. Additional Tips and Tricks It's wise to stay informed about your toilet and plumbing system. Regular maintenance can prevent many issues, making DIY repairs more manageable. For those less confident in their DIY abilities, don’t hesitate to contact a licensed plumber for significant repairs or if you feel out of your depth. A professional can provide swift solutions, ensuring your plumbing remains in good working order. Conclusion Being proactive and knowing how to turn off the water to your toilet can save you from serious headaches and costly repairs. Take the time to familiarize yourself with your toilet’s shut-off mechanism and your main water supply location—it’s a small effort that can yield big benefits in times of need.

12.15.2025

Maximize Your Kitchen Space: Find the Right Cabinet Height

Update The Importance of Finding the Right Kitchen Cabinet Height When it comes to kitchen remodeling, the height of your cabinets can make or break the functionality and visual appeal of your space. For a polished kitchen design, understanding standard cabinet heights and factors that may influence those measurements is crucial. Achieving the right cabinet height is not only about aesthetics but also about practicality. Here's what you need to know about cabinet heights and how they affect your kitchen layout. Understanding Standard Kitchen Cabinet Height Most homeowners often wonder what the ideal height is for kitchen cabinets. Standard kitchen cabinets are typically installed at 54 inches from the floor, with upper cabinets should be placed about 18 inches above the countertops. The reasoning behind this height is straightforward. A standard base cabinet is 34.5 inches tall, and when combined with a countertop that is generally 1.5 inches high, the total height becomes 36 inches. Adding the traditional 18-inch backsplash gives you a total height of 54 inches, which is a comfortable reach for most users. Factors Influencing Cabinet Height However, cabinet height is not a one-size-fits-all measure. Several factors can impact how high your cabinets should be: Ceiling Height: For kitchens with 9-foot ceilings, choosing 42-inch wall cabinets is common. This allows a tidy 12-inch space between the cabinets and the ceiling, creating a balanced look. Countertop Thickness: Depending on your choice of countertop, adjusting the upper cabinet height may be required to accommodate thickness variances. Cooking Range Proximity: Safety should always be a priority. Leaving enough distance between the cooking area and the cabinets is crucial to prevent heat-related hazards. Backsplash Height: The standard height for backsplashes is 18 inches, but variations can occur. Confirming the specific requirements for your kitchen can inform cabinet height decisions. Personal Reach: Ultimately, your family’s needs should dictate cabinet placement. Families that include taller or shorter individuals may benefit from custom cabinet heights. Best Practices for Installing Kitchen Cabinets While the standard measurements provide a great starting point, consider following these best practices: Measure Thoughtfully: Use a tape measure to determine the ideal height based on both user comfort and design preferences. Account for all kitchen elements, including cabinet bases and countertops. Consult the Experts: If you're unsure, consulting with experienced contractors or designers can elevate your kitchen design, ensuring you make the right choices for your unique space. Testing Convenience: Check accessibility of frequently used items. If you find yourself straining to reach an item, adjusting cabinet height could be a game-changer. Consider Customization: Many modern kitchens allow for customization, giving you the flexibility to design a space that’s truly functional for your lifestyle. Final Thoughts: Elevate Your Kitchen Aesthetic Choosing the right cabinet height can significantly transform your kitchen’s functionality and overall aesthetic. By blending comfort with style and practicality, you can create a kitchen that not only meets your everyday needs but also enhances your home’s appeal. Don't underestimate how crucial this single detail can be for your kitchen remodel! As you plan your renovation, keep in mind the multitude of factors to consider and be open to advice from professionals. They can offer invaluable insights tailored to your specific kitchen layout and personal preferences.

12.09.2025

Transform Your Space with Stunning Ceiling Bathroom Lighting Ideas

Update Shining a Light on Bathroom Design Trends Revamping your bathroom's ceiling lighting can significantly enhance your space, providing the perfect balance of form and function. In light of recent design trends, this guide will explore contemporary ceiling lighting ideas that are both stylish and practical. Perfect for anyone looking to transform a mundane bathroom into a serene retreat, these lighting solutions bring functionality while creating a luxe atmosphere. Importance of Lighting in Bathroom Design The right ceiling lighting is essential in defining the ambiance of your bathroom. This often-underestimated element can uplift the overall aesthetic, making even the smallest spaces feel grand. With advancements in lighting technology, options now range from energy-efficient LEDs to smart lighting systems, offering endless possibilities for creativity. 1. Emphasize General Lighting Begin your bathroom remodel by considering general lighting that provides a comprehensive illumination. Using overhead fixtures makes a world of difference, especially if you focus on areas where light is crucial, such as near the vanity and shower. Flush-mount fixtures or recessed lighting ensures you achieve a bright, clear space that remains stylish. 2. Layering for Depth and Functionality Experimenting with various types of lighting creates depth and interest in your bathroom. Employing a mix of ambient, task, and accent lighting can illuminate key spaces effectively. For instance, brass fittings can add elegance while sconces beside the mirror provide focused light for grooming tasks. 3. Statement Chandelier for Luxury Why not add a touch of glamour? A chic chandelier can serve as a stunning focal point. Adding a modern or vintage chandelier not only elevates your bathroom's decor but also offers ambient lighting throughout the space. Popular choices include crystal chandeliers or metallic finishes that tie together contemporary themes. 4. Incorporating LED and Smart Lighting LEDs are revolutionizing bathroom lighting with their long-lasting nature and energy efficiency. Moreover, smart lighting systems allow for customizable settings that match different moods, from bright light for a morning routine to a soft glow for relaxing evenings. Imagine controlling your lighting with just your voice—a perfect marriage of luxury and convenience! 5. Ambient and Accent Lighting Introduce ambient lighting for an overall glow and accent lighting to highlight specific features, such as artwork or architectural details. Consider recessed lighting above a bathtub or a backlit mirror to create an inviting atmosphere. This layered approach gives your bathroom a spa-like feel, making it a sanctuary for self-care. Using Natural Materials Natural materials like wood and stone are trending in 2025 bathroom designs. Combining these elements with strategic lighting choices enhances warmth and makes your space feel grounded. Wooden accents, especially when paired with pendant or geometric light fixtures, create a serene environment that invites relaxation. 6. Color and Textures Matter Have fun with colors in your bathroom lighting. Whether you prefer cool tones for a tranquil vibe or warm hues for a cozy atmosphere, color impacts mood and style. Textured lampshades or unique fixtures can act as art pieces while also serving important lighting functions. Conclusion: Transform Your Bathroom with Lighting As you explore these bathroom ceiling lighting ideas, consider how each element can reflect your personal style while fulfilling practical needs. A successful lighting design involves balancing beauty and functionality for a cohesive and serene atmosphere. Take the plunge and elevate your bathroom into a well-lit haven that's both stylish and personal. Discover the latest lighting options available today and start your journey toward a transformed, serene retreat.

Terms of Service

Privacy Policy

Core Modal Title

Sorry, no results found

You Might Find These Articles Interesting

T
Please Check Your Email
We Will Be Following Up Shortly
*
*
*