Add Row
Add Element
Add Element
  • Home
  • Categories
    • Makeovers DIY
    • Contractor Services DFY
    • Home Experts DWY
    • Smart Home Upgrades
    • Outdoor Living
    • Down Sized Living
    • Featured
    • Community Causes
August 21.2025
3 Minutes Read

DIY Shower Pan: A Beginner's Guide to Customizing Your Shower Experience

Shower pan construction showing wire mesh and drain in a workshop.

Customizing Your Shower Experience: The Benefits of DIY Shower Pans

While store-bought shower pans may be convenient, creating a custom shower pan allows for greater flexibility in both design and functionality. DIY shower pans can be tailored to fit unique dimensions, ensuring they not only look great but also serve your household's practical needs. Customization extends beyond mere aesthetics; it incorporates factors like size, shape, and the type of materials used, which can all contribute to a more comfortable and efficient shower experience.

Understanding the Basics: What Makes Up a Shower Pan?

A shower pan, also known as a shower base, is crucial for directing water toward the drain, preventing leaks, and maintaining a dry subfloor. Most commonly, shower pans are constructed from a durable mortar base topped with tiles. This traditional method lends itself to creativity, allowing homeowners to select materials that match their bathroom decor. Knowing the basic components of a shower pan—such as the pre-slope, waterproof liner, and top slope—is essential when embarking on a DIY project.

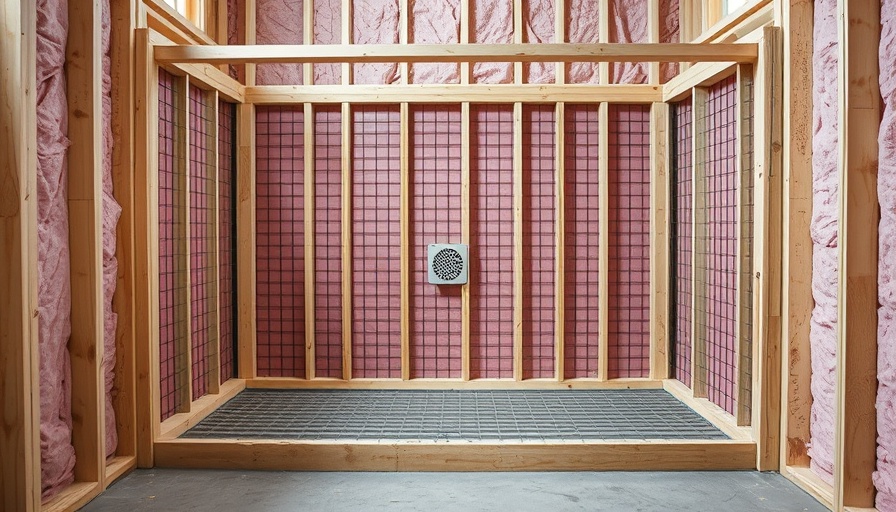
A Step-by-Step Guide to Building Your Shower Pan

Constructing a shower pan may seem daunting, but breaking it down into steps can simplify the process. Start by measuring your shower space accurately; ample attention is needed to ensure the correct dimensions, especially if you want to add curves or unique angles. After framing the shower pan with appropriately sized boards, use a layer of tar paper to provide protection against water damage. Next, apply the pre-slope followed by the waterproof liner, and finish with a top slope layer. Finally, complete the pan with tiling to achieve that elegant look.

Tools of the Trade: What You'll Need for Your Project

Before you begin crafting your shower pan, gather your tools. Essential items include a circular saw for cutting boards, a mix tray for mortar, a flat trowel, a level to ensure even surfaces, and, of course, your tiles. Each tool plays a vital role in ensuring that your shower pan is durable and beautifully constructed. Depending on your personal preference, you may choose materials like ceramic or porcelain tiles for the finish.

Maintenance and Long-Term Care: Ensuring Longevity

Once installed, a shower pan requires regular maintenance to ensure it continues to function optimally. It’s essential to check for any signs of wear along the grout lines and the waterproof liner periodically to prevent potential leaks. Proper cleaning and sealing can prolong the life of both your shower pan and the tiles, reducing the necessity for costly repairs in the future.

Conclusion: Take the Plunge into DIY

Building a shower pan may be a labor-intensive endeavor, but with a bit of preparation and know-how, it can also be a rewarding one. The satisfaction of having a shower that perfectly meets your needs and preferences cannot be understated. So why not embark on this home improvement journey? Not only will it elevate your bathroom's aesthetic, but it will also provide you with a functional area tailored just for you.

Featured

0 Views

0 Comments

Write A Comment

*
*
Related Posts All Posts
10.05.2025

Why Does My Water Heater Pilot Light Keep Going Out? Uncover the Easy Fixes!

Update Understanding Your Water Heater's Pilot Light A water heater’s pilot light is a small but vital component that initiates the heating process. When this flame goes out unexpectedly, it can leave you without hot water, an inconvenient situation, especially during the cold months. Whether you are dealing with lukewarm showers or needing to lash out at cold taps, knowing how to tackle pilot light issues can save you both time and repair costs. Common Causes of Pilot Light Malfunctions If you find yourself frequently reigniting your water heater’s pilot light, it’s essential to understand the root causes and the steps you can take to address them. Here are the top issues that might cause your pilot light to flicker or go out entirely: 1. The Thermocouple is Faulty The thermocouple is a safety device that detects whether the pilot light is burning. If it senses that the flame has gone out, the thermocouple will shut off the gas supply to prevent leaks. A malfunctioning thermocouple is one of the most common reasons for a pilot light that won’t stay lit. Thankfully, this repair is generally straightforward and can often be done within an hour. 2. Insufficient Combustible Air Your water heater needs a consistent supply of air to maintain the pilot flame. If the area surrounding your heater is cluttered with debris or lint, it can restrict airflow and cause the flame to go out. Regular cleaning is crucial to ensure proper ventilation and unimpeded airflow. 3. A Dirty Pilot Tube The pilot tube is responsible for delivering gas to the pilot light. If it becomes clogged with dust or other debris, the pilot light may not receive enough gas, resulting in a flickering flame or extinguishing altogether. It is essential to clean this component regularly to maintain consistent operation. 4. Main Control Valve Problems Another less common but equally troublesome issue could stem from the main control valve. This component controls the flow of gas to the burner and may need to be replaced if it doesn’t function correctly. If you suspect a problem with the main control valve, it is recommended to contact a professional for assistance. 5. Electrical Wiring Issues Bad electrical wiring can also play a role in pilot light problems. If your water heater suddenly shuts off, it could signal an issue with the electrical setup. Always hire a licensed professional to address electrical concerns to ensure safety and proper diagnosis. Steps to Resolve Pilot Light Issues Here are some practical steps you can take if you find your pilot light has gone out: Check the Thermocouple: If you suspect the thermocouple needs replacing, follow manufacturer directions cautiously to carry out the replacement. Clean the Surroundings: Ensure there are no dust or debris around the heater to maintain good airflow. Unclog the Pilot Tube: If debris is blocking the pilot tube, carefully clean it using a slender needle or pipe cleaner. Seek Professional Help: If these measures do not resolve the issue, or if you face electrical or main control valve problems, it’s time to call in an expert for a thorough inspection and service. When to Call a Professional While many pilot light issues can be resolved through simple troubleshooting, certain symptoms warrant a professional examination. If you frequently experience problems despite attempts to fix them, it’s crucial to seek expert assistance. Professionals can provide reliable diagnosis and avoid potential hazards, ensuring your system runs smoothly and safely. Embracing Water Heater Awareness Understanding your water heater’s functionality—or lack thereof—can empower you as a homeowner. Taking proactive steps not only enhances the longevity of your appliance but improves efficiency, resulting in consistent hot water for your needs. Should you ever experience issues that seem beyond DIY fixes, don’t hesitate to reach for professional help. Your comfort and safety should always come first.

09.30.2025

Elevate Your Bedroom: Discover the Luxury of a TV Lift Cabinet

Update Elevate Your Bedroom Experience with a TV Lift Cabinet Imagine ending a long day, nestled comfortably in your bed, watching your favorite shows without the clutter of traditional TV setups. With one simple remote, a beautifully crafted TV lift cabinet reveals your entertainment in style. This innovative piece of furniture not only enhances your viewing experience but transforms your bedroom into a sanctuary of relaxation and luxury. The Beauty of a Clutter-Free Space The modern bedroom should serve as a retreat, an escape from everyday stress. Traditional TVs mounted on walls or bulky stands can detract from the serene atmosphere we desire. The addition of a TV lift cabinet cleans up visual distractions, providing a tidy, peaceful space. With the capability to tuck away your television when not in use, you reclaim valuable floor space and enhance the aesthetic appeal of your room. Functionality Meets Design: The Case for TV Lift Cabinets TV lift cabinets offer more than just a place for your television. These sophisticated pieces feature hidden storage spaces for remotes, gaming consoles, or DVDs, keeping your items organized and out of sight. The smooth motorized operation allows for controlled viewing at your convenience, making it easier to enjoy your entertainment without the hassle of cords and clutter. Quality Craftsmanship: Why Handcrafted Matters Choosing a TV lift cabinet from manufacturers like TVLiftCabinet.com ensures you receive a product made from 100% American craftsmanship. Using real wood and high-quality finishes, these cabinets promise durability and elegance. Whether you prefer a warm wooden finish or a modern, sleek look, there’s a lift cabinet to suit your personal style and needs. Popular Choices for the Discerning Homeowner Among the standout options is the Clubside Honeycomb TV Lift Cabinet, a perfect mix of design and function that accommodates screens up to 55 inches. The unique honeycomb finish not only enriches the room's decor but also guarantees a quiet, seamless experience with every lift. This specific model epitomizes what it means to blend style and technology in your personal space. Who Can Benefit from a TV Lift Cabinet? If you’re passionate about interior design or simply want to integrate the latest smart furniture solutions into your home, a TV lift cabinet is for you. It appeals to homeowners looking to minimize visual clutter while enjoying modern conveniences. For tech enthusiasts, integrating such smart designs helps to create an interactive, sophisticated living environment. Changing Perspectives: Embracing Smart Home Solutions The integration of smart technologies into home design is rapidly growing. The TV lift cabinet is a prime example of this trend, as it caters to the desire for streamlined functionality in living environments. Motorized lift systems, controllable via remote or smart devices, exemplify how technology can enhance our daily lives, making entertainment more accessible and enjoyable. Conclusion: Transform Your Sleeping Space Today By investing in a TV lift cabinet, you're not just purchasing furniture–you’re enhancing your lifestyle. This luxurious upgrade eliminates clutter, heightens comfort, and revamps your entertainment experience. Are you ready to elevate your bedroom into an oasis of peace and style? Explore the options available to you today!

09.26.2025

Expert Steps to Clean Your Shark Vacuum for Maximum Suction Power

Update Why Cleaning Your Shark Vacuum is Essential Maintaining your Shark vacuum isn’t just about aesthetics; it’s crucial for ensuring its longevity and efficiency. Over time, dirt, hair, and other debris can accumulate in various components including the dust cup, filters, and brush rolls. If left unchecked, not only does this lead to decreased suction power, but it can also emit unpleasant odors and even ultimately damage the motor. Addressing these issues promptly ensures that your vacuum remains a valuable ally in your cleaning arsenal. What You Need to Clean a Shark Vacuum Before diving into the cleaning process, gather the right tools. Here’s a checklist of items you’ll need: Microfiber cloths for wiping and dusting A large bowl or sink for rinsing parts A trash can for disposing of debris A soft-bristled nylon brush to tackle tough spots Gloves to protect your hands A drying rack for air-drying components A seam ripper or small scissors to remove tangled hair from the roller brush Equipping yourself with these tools ensures that you efficiently clean every aspect of your Shark vacuum, from the dust cup to the roller brushes. Step-by-Step Guide to Cleaning Your Shark Vacuum With your tools ready, you can follow these detailed steps to clean your Shark vacuum: Step 1: Safety First Always unplug your vacuum before starting the cleaning process. If possible, take it outdoors to avoid a mess inside your home when shaking out debris. Step 2: Inspect and Clean the Roller Brush The roller brush is often a hotspot for hair and dirt buildup. Detach it carefully following the manufacturer’s instructions — most models have a push button for easy release. Once detached, use scissors to carefully cut away any hair or debris tangled in the brush. You can then use a soft brush or cloth to clean the remaining dirt. Ensure the brush dries completely before reattaching it, as moisture can lead to mold growth inside your vacuum. Step 3: Empty and Clean the Dust Collection Cup Regularly check the dust cup and empty it once it’s half full to maintain suction power. Dispose of the contents into a trash can and rinse the cup with warm water to eliminate any residue. Allow the dust cup to dry completely before reassembly. This periodic cleaning will enhance airflow and performance. Step 4: Clean the Filters Your Shark vacuum likely features washable filters. Remove the filters according to your vacuum’s user manual, rinse them with water, and let them air dry fully. Avoid using a cloth to hasten the drying process, as this can damage the filters. Replace them only once they are completely dry to uphold optimal performance. Step 5: Inspect Hoses for Blockages After completing the cleaning of detachable parts, check the vacuum’s hose for any clogs. You can gently flex the hose and use a long object like a broom handle to dislodge any blockages. A clear hose ensures unimpeded airflow, enhancing your vacuum’s efficiency. How Often Should You Clean Your Shark Vacuum? The frequency with which you clean your Shark vacuum largely depends on usage. A general guideline is to perform these cleaning steps every month or after a significant cleaning session, particularly if you have pets or frequent visitors with pets. Check the filters regularly as well, especially if you notice a decrease in suction power — they may need a rinse or replacement as necessary. Investing Time for Longevity By taking the time to regularly clean your Shark vacuum, you are investing in the longevity and effectiveness of this vital cleaning tool. Failing to put in this effort can lead to costly repairs or replacements down the line. Get Started on Your Cleaning Journey Now that you’ve read through this comprehensive guide, it’s time to put these steps into action. Not only will your Shark vacuum perform better, but you’ll also experience a fresher, more pleasant environment at home.

Terms of Service

Privacy Policy

Core Modal Title

Sorry, no results found

You Might Find These Articles Interesting

T
Please Check Your Email
We Will Be Following Up Shortly
*
*
*