 Add Row
  Add
Add 
Transforming Your Space with Regrouting
Regrouting your tiles can be a transformative DIY project. Rather than incurring the cost and mess of a full tile replacement, regrouting breathes new life into your existing floor. The process not only enhances the aesthetic appeal but also extends the lifespan of your tiles by ensuring a solid protective barrier against moisture and dirt.
Why Choose Regrouting Over Replacement?
As tiles age, their grout can discolor, crack, or wear out, making your floors look old and dingy. Choosing to regrout can save you significant money compared to retiling, which involves a much more extensive process. According to home improvement experts, regrouting costs range from $15 to $30 for every 16 square feet, making it a budget-friendly solution for many homeowners.
The Essential Tools and Materials
Prior to starting your regrouting project, it's essential to gather all necessary tools. You'll need:
- Grout mix
- Tile sealant
- Oscillating tool
- Sponges and cloths
- Grout float
- Bleach solution
These items are vital for ensuring a successful and efficient regrouting process.
Step-by-Step Process for Regrouting
1. Cleaning the Grout
The first step in the regrouting process is to clean the existing grout thoroughly. A bleach solution can effectively lift dirt and fungus. Scrub the grout lines using a toothbrush for a deeper clean.
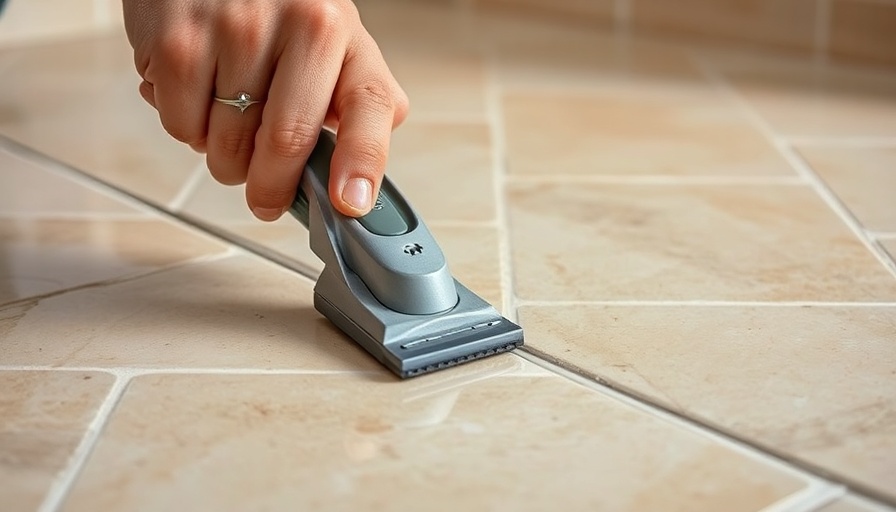
2. Removing the Old Grout
Use an oscillating tool to carefully remove the old grout without damaging the tiles. Focus on one section at a time and ensure the area remains clean and clear of debris.
3. Vacuuming the Surface
Once the old grout is removed, vacuum the area meticulously. It's essential that there is no remaining dust or residues in the grout lines before applying new grout.
4. Mixing and Applying New Grout
Following the manufacturer's instructions, mix your new grout to a smooth consistency. Use a grout float to load the grout onto the lines, making sure to pack it in fully. Work in small sections for better control.
5. Cleaning Up Excess Grout
Once the joints are filled, use a damp sponge to wipe away any excess grout on the tile surface before it dries. Be careful not to pull out grout from the joints while cleaning.
6. Removing Grout Haze
After the grout has set, some haze may remain on the tiles. Use a soft cloth to buff the surface until it shines, ensuring a clean and professional finish.
7. Sealing the Grout
Once the grout has completely cured, apply a tile sealant to protect against moisture and stains.
8. Maintenance Tips
To keep your tiles looking their best, clean and reseal the grout regularly. Regular maintenance can significantly extend the longevity of your tile floor.
The Benefits of Regrouting
Regrouting not only improves the look of your tiles but also provides a protective layer against mildew and moisture, essential in preventing future damage. This longevity makes it a worthwhile investment for any homeowner.
Actionable Insights for Homeowners
Before you decide to embark on your regrouting project, consider hiring a professional if you're unsure about handling tools or the process. However, for DIY enthusiasts, securing reliable information and assistance from home improvement platforms can make your project financially and aesthetically rewarding.
Conclusion
Regrouting your tile floors can seem daunting, but by following these steps, you will find it manageable and gratifying. Not only will you enhance the beauty of your home, but you will also protect your investment. If you're considering taking on this project, now is the perfect time to revitalize your living space!


 Add Row
  Add
Add 
Write A Comment