Add Row
Add Element
Add Element
  • Home
  • Categories
    • Makeovers DIY
    • Contractor Services DFY
    • Home Experts DWY
    • Smart Home Upgrades
    • Outdoor Living
    • Down Sized Living
    • Featured
    • Community Causes
July 30.2025
3 Minutes Read

Solving Shower Diverter Issues: Expert Tips and DIY Steps

Close-up of hand with shower diverter parts, repair in bathtub.

Understanding the Shower Diverter: A Vital Component

The shower diverter, often an overlooked mechanism in many homes, plays an essential role in directing water flow between the bathtub faucet and the showerhead. When it malfunctions, it can result in a frustrating experience where water flows simultaneously from both outlets, making what should be a relaxing shower turn into an inconvenient hassle. Common types of diverters include the 3-valve diverter used with two-tap faucet showers, the 2-valve diverter found in single-dial temperature control systems, and the Tee diverter, which is typically pulled up to function. Understanding your diverter type is a critical first step in ensuring effective repairs.

Signs That Your Diverter Needs Attention

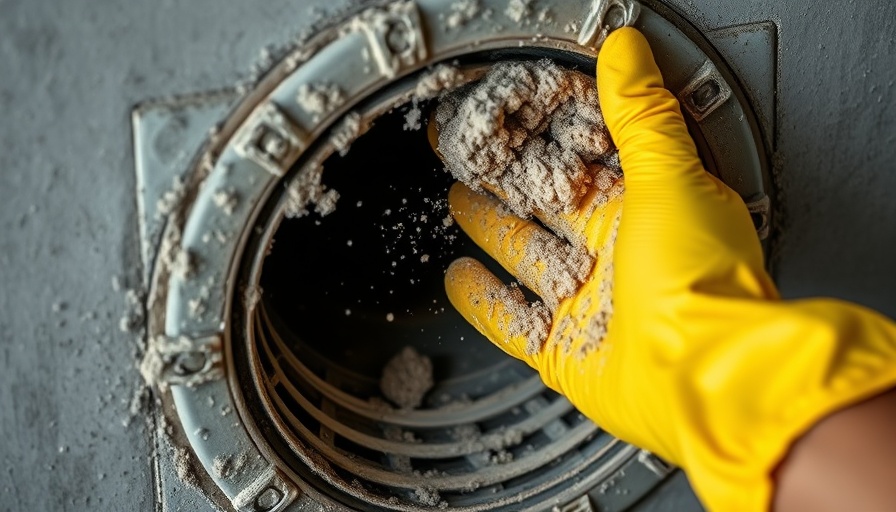
It's relatively easy to identify problems with a shower diverter. If turning the diverter doesn't entirely redirect the water, or if both tub and shower outlets run concurrently, a malfunction is evident. Issues often stem from build-up of limescale or debris within the device, which prevents its internal stopper from creating a proper seal. Regular maintenance can prevent these issues, but when they occur, simple DIY fixes can save you a costly plumber's bill.

Essential Tools and Materials for the Fix

Before taking on the repair, gather the necessary tools and materials to ensure a smooth process. Common items include:

  • Vinegar – for cleaning;
  • Traditional cleaning supplies like a soft brush and paper towels;
  • Tools like screwdrivers and pliers;
  • Waterproof tape and duct tape;
  • Sprays or lubricants such as cooking spray to ease stuck components.

Having these materials ready will streamline your repair process, preventing unnecessary delays or frustrations.

DIY Repair: Step-By-Step Guide

Fixing your shower diverter can often be accomplished without professional help. Here’s a straightforward method to get it working efficiently again:

1. Cleaning the Diverter Spout
Clogs caused by limescale or debris can hinder a diverter's function. A simple cleaning solution of vinegar can work wonders. Mix equal parts vinegar and water, then submerge the affected diverter in the solution using a plastic bag secured with a rubber band. Allow it to soak for three to four days to break down the build-up.

2. Using Cooking Spray
If the diverter remains stuck even after cleaning, apply a light coat of cooking spray to loosen the mechanism. It's an accessible solution and preferable to chemical compounds that might corrode the metal or plastic elements of your diverter. Avoid using wax or hairspray as these might cause long-term corrosion.

Misinformation and Myths in Home Repairs

One major misconception is that all plumbing issues require a professional touch. Many homeowners can tackle basic repairs themselves—sometimes with little more than everyday household items. This empowerment is essential, especially when common scenarios arise. It’s beneficial for homeowners to familiarize themselves with minor plumbing repairs to save time and expenses.

Future Perspectives on Home Maintenance

As households increasingly invest in DIY home and garden improvements, knowledge of systems like shower diverters represents not only a skill but also a way to elevate the quality of living spaces. Learning how to maintain plumbing systems ensures longevity and functionality in the home. Educational resources, online tutorials, and community workshops present an opportunity to engage with the practical aspects of home care.

Conclusion: Take Action!

Don’t let a simple diverter issue disrupt your bathroom serenity. Armed with the right knowledge and tools, you can tackle this repair easily. Furthermore, educating yourself on home maintenance empowers you as a homeowner, reduces dependency on professional services, and helps you understand the potential for future upgrades in your living space. Your journey to effective home management starts with familiarizing yourself with your home systems. If tackling this task sounds daunting, connect with local DIY communities or experienced plumbers who can provide insights or assistance when needed. Start your home improvement journey today!

Featured

0 Views

0 Comments

Write A Comment

*
*
Related Posts All Posts
07.29.2025

What Type of Bathroom Drywall Should You Choose for Durability and Style?

Update Choosing the Right Bathroom Drywall: A Must-Read Guide Are you overwhelmed by the options available for bathroom drywall? You're not alone. With moisture control and durability being crucial for wet areas, choosing the right type of drywall can be a daunting task. It's essential not just for the longevity of your bathroom but also for mold prevention and overall safety. This guide aims to clarify your choices by outlining the most common drywall types suited for bathrooms, their characteristics, and key factors to consider during installation. Understanding the Types of Bathroom Drywall Each drywall type comes with distinctive attributes that make it suitable for various applications in your home. Here are the leading contenders for your bathroom renovation or new build: 1. White Board Drywall White Board Drywall is often the go-to option for many homeowners. Its moisture-resistant qualities and aesthetic appeal make it suitable not only for bathrooms but also for living areas and bedrooms. Boasting a perfect blend of practicality and style, it’s a safe and classic choice. 2. Blue Board Drywall Another favorable option, Blue Board is known for its water-resistant traits and relatively robust construction. Often preferred for plaster finishes, this drywall can be installed in various locations throughout your home, providing versatility and reliability against moisture damage. 3. Green Board Drywall While Green Board exhibits moisture resistance, it is essential to note that it is not entirely waterproof. Homeowners should weigh their options carefully when considering this for areas of high humidity, like bathrooms or kitchens, as it may not provide the durability expected. 4. Purple Board Drywall For those prioritizing moisture resistance, the Purple Board is an exceptional choice, designed specifically for withstanding high moisture environments. While it may be on the pricier side, this drywall—offering both waterproof properties and longevity—can be seen as an investment in your home’s health. 5. Paperless Drywall Emerging as a modern alternative, Paperless Drywall is becoming increasingly popular for its mold resistance and ease of cleaning. Although it may require a higher financial commitment, many homeowners find it worth it for the added benefits. 6. Type X Drywall Lastly, Type X Drywall distinguishes itself with its fire-resistant properties. Although primarily used for fire safety, it can also be a solid option for moisture-prone areas, giving you peace of mind in multiple respects. Insulation: A Critical Step Before Installation Before diving into installation, attention to insulation is crucial. Proper insulation not only enhances energy efficiency but also helps in moisture control, reducing the risk of mold formation. Depending on your climate, choose the right thickness for your insulation—thicker for colder regions and standard insulation for warmer climates. Installation Tips for Success Once your drywall choice is made, and the area is insulated, it’s time to put it all together. Ensure to cut the drywall carefully, using a saw for tougher varieties like Type X. Prioritize smooth edges to minimize mold and moisture risks, and always wear protective gear while working for safety. If you're unsure, consulting a professional can save time and prevent potential issues down the line. The Emotional Journey of Renovation Remodeling can evoke a mix of emotions ranging from excitement to anxiety. As you embark on your renovation project, consider how your choices today impact your future living space. Invest in quality materials to create a safe, inviting, and enjoyable atmosphere, allowing you to fully enjoy your home. Understanding your options will empower you to make informed decisions that resonate with your lifestyle and budget. Choosing the right bathroom drywall goes beyond aesthetic appeal; it’s about ensuring safety and maintaining a healthy environment. Ready to get started? Investing in quality materials will pay off in the long run. Start planning your project today and create the bathroom of your dreams!

07.28.2025

Discover 15 Homemade Milk Bath Recipes for Luxuriously Soft Skin

Update Indulge in Self-Care with Homemade Milk Baths In today's fast-paced world, taking time for self-care can feel like a luxury rather than a necessity. However, achieving luxuriously soft skin doesn't have to require a trip to an expensive spa. With just a few simple ingredients found at home, creating a soothing milk bath can transform your bathing experience into a rejuvenating ritual. Understanding the Benefits of Milk Baths Milk baths are renowned not only for their luxurious feel but also for their numerous skin benefits. They can effectively combat dryness, soothe skin irritation, and provide essential nutrients that help restore the skin's natural glow. The lactic acid in the milk acts as a gentle exfoliant, removing dead skin cells and promoting smoother skin. Incorporating other ingredients, such as oatmeal or honey, can further enhance the milk bath’s moisturizing properties. For instance, oatmeal is known to calm inflamed skin, making it ideal for those suffering from conditions like eczema or psoriasis. This combination makes milk baths not just a treat for your senses but a therapeutic remedy for various skin issues. 15 Delightful Milk Bath Recipes to Try We've curated a selection of 15 easy homemade milk bath recipes that cater to different skin needs and preferences. Here are a few standout options to get you started: Coconut Oil Milk Bath Ingredients: Baking Soda: 1/2 cup Coconut Oil: 15-20 drops Powdered Milk: 1 ½ cup This simple yet effective recipe utilizes coconut oil, known for its hydrating properties, making your skin feel silky smooth. Mix the ingredients and store them in an airtight container for a refreshing bath experience. Vanilla, Rose, and Salt Milk Bath Dry Ingredients: Baking Soda: 1 cup Citric Acid: ½ cup Corn Starch: ¼ cup Powdered Buttermilk: ½ cup Bentonite Clay: 1/3 cup Colloidal Oatmeal: 1/3 cup Titanium Dioxide: 1 tablespoon Wet Ingredients: Cocoa Butter: 1.5 tablespoon Shea Butter: 1.5 tablespoon Fragrance Oil: 3 tablespoon (vanilla scent) This enchanting blend not only smells divine but also nourishes the skin deeply, making it an ideal option for a romantic evening or a personal pampering session. Incorporating Milk Baths into Your Routine For those new to the concept, incorporating milk baths into your routine is easy and can be refreshing. Set aside time during the week to treat yourself with a milky soak. Adding a few drops of essential oils or lovely flower petals can create a spa-like ambiance at home. Experiment with different combinations mentioned above to find your ideal formula. Whether you prefer the tropical vibe of coconut or the soothing effects of roses, there are endless possibilities to explore. Consider creating larger batches of your favorite recipes to share with friends or family, inviting them into a relaxing experience with you. Final Thoughts on Homemade Milk Baths Investing time into a self-care ritual such as a milk bath can yield delightful results for both the skin and the mind. Combining affordable, homemade materials allows for customization tailored to your unique skincare needs, ensuring a nourishing experience that is also economically wise. Don't hesitate to dive into the world of homemade milk baths. With the right ingredients, you can achieve soft and glowing skin while embracing a moment of tranquility in your busy life.

07.27.2025

Discover the Dirtiest Spots in Your Home and How to Fix Them

Update Unveiling the Hidden Germs: What You’re Missing While Cleaning Many of us take pride in cleaning our homes, meticulously vacuuming carpets and scrubbing counters. Yet, despite these efforts, a significant question remains: are we truly cleaning our homes effectively? Surprisingly, many homeowners overlook several critical areas that could harbor harmful bacteria, allergens, and dust. This article dives into the dirtiest spots in your home you likely never clean, providing practical, actionable solutions to maintain a healthier living environment. The Invisible Threats in Every Home While the visible aspects of your home may appear spotless, it's often the nooks and crannies that accumulate the most dirt. Areas like ceiling fans, light fixtures, and baseboards may seem innocuous, yet they can house significant dust, pet dander, and germs. Cleaning these overlooked zones not only enhances your home’s visual appeal but also plays a crucial role in improving indoor air quality and reducing triggers for allergies. Spotlight on the Dirtiest Places Let’s shed some light on these culprits: 1. Ceiling Fans and Light Fixtures Often, ceiling fans and light fixtures gather a surprising amount of dust and allergens. When fans spin or lights are turned on, they distribute these particles throughout the home, potentially aggravating respiratory issues. A simple solution involves using a pillowcase over fan blades to trap the dust while cleaning. 2. Baseboards and Trim Work Baseboards and trim work not only frame rooms but also accumulate dust and pet hair. These surfaces can also suffer from scuff marks and mold, especially in humid areas like bathrooms. By incorporating baseboard cleaning into your quarterly routine, you can prevent these issues. 3. Window Tracks and Sills Behind those sparkling windows, grime often builds up in the tracks and sills. This debris can impede window functionality and affect air quality if left unaddressed. A vinegar-water solution can effectively tackle stubborn grime, improving both aesthetics and air circulation. 4. Under and Behind Major Appliances In spaces where we place large items, such as refrigerators and ovens, dirt accumulates unnoticed. These areas can harbor mold and pest infestations. Regularly cleaning underneath and behind these appliances with a vacuum or a brush helps maintain a sanitary cooking environment. 5. Bathroom Fixtures Bathroom fixtures and faucets may look clean at first glance, but water spots and soap scum can become breeding grounds for bacteria. Incorporating a routine for detailing these often-neglected surfaces can hinder bacterial growth, enhancing hygiene. Why This Matters for Your Health Understanding the importance of cleanliness extends beyond appearances. Keeping hidden areas clean results in a healthier home. Hidden germs can trigger allergies and respiratory issues, especially in individuals with pre-existing conditions. By adopting simple, regular cleaning tasks to tackle these dirty spots, you can create a much safer living atmosphere. Embracing Regular Deep Cleaning Whether you’re a seasoned DIY expert tackling this as a weekend project or seeking professional help, addressing these hidden spaces can significantly enhance your quality of life. Not only does this prevent dirt buildup, but it also contributes to the longevity of your home. Consider integrating these cleaning tasks into your routine to reap the benefits. In sum, the unseen dirt in your home presents more than an aesthetic issue. It impacts your health and comfort. Challenge your cleaning habits and take the time to address these spots today!

Terms of Service

Privacy Policy

Core Modal Title

Sorry, no results found

You Might Find These Articles Interesting

T
Please Check Your Email
We Will Be Following Up Shortly
*
*
*